Menu
Start Free $129 Lifetime
Why is it the #1 bulk uploader?
- Insanely fast!
- Maintains folder structure.
- 100% automated upload.
- Supports RAW files.
- Privacy default.
How can you get started?
Download PicBackMan and start free, then upgrade to annual or lifetime plan as per your needs. Join 100,000+ users who trust PicBackMan for keeping their precious memories safe in multiple online accounts.
Trusted by users in 125+ countries.
“Your pictures are scattered. PicBackMan helps you bring order to your digital memories.”
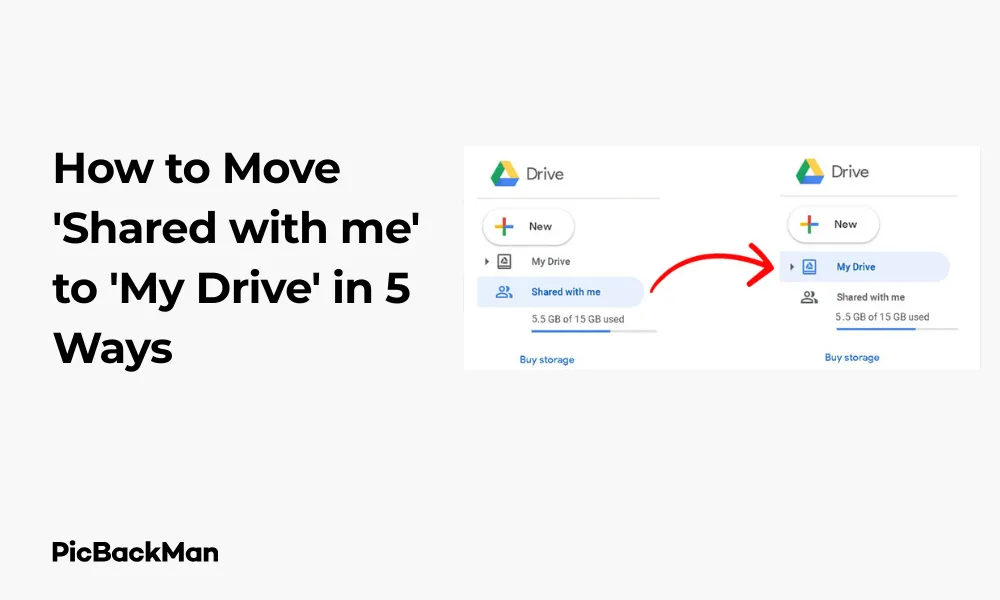
How to Move 'Shared with me' to 'My Drive' in 5 Ways

If you're a Google Drive user, you've probably received files shared by colleagues, friends, or family members. These files appear in the “Shared with me” section but aren’t actually stored in your Drive storage. Want to organize these shared files better? Let's explore five simple methods to move files from "Shared with me" to "My Drive" for easier access and better organization.
Why Move Files from “Shared with Me” to “My Drive”?
Before diving into the methods, let's understand why you might want to move these files:
- Better organization within your own folder structure
- Quicker access to important shared documents
- Offline access to shared files
- Protection against the original owner deleting the file
- Easier searching within your Drive
Now, let's look at the five ways to move those shared files to your Drive.
Method 1: Using the "Add to My Drive" option
This is the most straightforward method to move files from "Shared with me" to "My Drive."
Step-by-Step Instructions:
- Open Google Drive and click on “Shared with me” in the left sidebar
- Find the file you want to move
- Right-click on the file
- Select "Add to My Drive" from the dropdown menu
- The file will now appear in your “My Drive” section
This method creates a shortcut to the original file in your Drive. It doesn't create a duplicate or use additional storage space. You're essentially creating a reference to the original shared file.
What Happens to the Original File?
The original file remains in the "Shared with me" section, and any changes made by the owner will still affect your version. If the owner removes your access or deletes the file, you'll lose access to it even from your "My Drive."
Method 2: Using the Drag and Drop Feature
Another user-friendly way to move files is by using the drag and drop functionality.
Step-by-Step Instructions:
- Open Google Drive in your browser
- Click on “Shared with me” in the left sidebar
- Select the file(s) you want to move
- Drag the selected file(s) to “My Drive” in the left sidebar
- Drop the file(s) when "My Drive" is highlighted
This method also creates a shortcut rather than a copy. It's particularly useful when you want to move multiple files at once.
Moving Files to Specific Folders
You can also drag files directly to specific folders within your Drive:
- Open "Shared with me"
- Select your file(s)
- In a new browser tab, open Google Drive and navigate to the destination folder
- Arrange your browser windows side by side
- Drag the file(s) from "Shared with me" directly to the destination folder
Method 3: Making a copy of the file
If you want full ownership and control of a shared file, making a copy is your best option.
Step-by-Step Instructions:
- Go to “Shared with me” in Google Drive
- Right-click on the file you want to copy
- Select "Make a copy" from the dropdown menu
- A new copy will be created in your “My Drive” with “Copy of” added to the filename
- Rename the copy if desired by right-clicking and selecting “Rename”
Benefits of Making a Copy
Creating a copy offers several advantages:
- You get full ownership of the new file
- Changes made by the original owner won't affect your copy
- You can edit the file without affecting the original
- You'll retain access even if the original owner revokes sharing permissions
Storage Considerations
Keep in mind that copies count against your Google Drive storage quota, unlike shortcuts. If you're copying large files or numerous documents, check your available storage first.
Method 4: Using the "Move to" Function
The "Move to" function allows you to place shared files in specific folders within your Drive.
Step-by-Step Instructions:
- Navigate to “Shared with me” in Google Drive
- Select the file(s) you want to move
- Right-click and select “Move to” from the dropdown menu
- In the pop-up window, navigate to the destination folder in your Drive
- Click "Move" to complete the action
Creating a New Folder During the Move
You can create a new folder during the move process:
- Follow steps 1-3 above
- In the "Move to" dialog box, click on the "New folder" button (folder+ icon)
- Name your new folder and click "Create"
- Select the newly created folder
- Click "Move"
This method helps you organize files directly into your folder structure without additional steps.
Method 5: Using Google Drive Mobile App
On the go? You can also move shared files to your Drive using the mobile app.
Step-by-Step Instructions for Android:
- Open the Google Drive app on your Android device
- Tap on the “Shared” tab at the bottom
- Find and tap the three dots (⋮) next to the file you want to move
- Select "Add shortcut to Drive" from the menu
- Choose the destination folder in your Drive
- Tap "Add" to complete the process
Step-by-Step Instructions for iOS:
- Launch the Google Drive app on your iPhone or iPad
- Tap "Shared" at the bottom of the screen
- Locate the file you want to move
- Tap the three dots (⋮) next to the file
- Select "Add shortcut to Drive"
- Select the destination folder
- Tap "Add" to finish
Making a Copy on Mobile
To create a copy using the mobile app:
- Find the file in the "Shared" section
- Tap the three dots (⋮)
- Select "Make a copy"
- The copy will appear in your "My Drive"
- You can rename or move it later
Understanding File Permissions After Moving
It's important to understand what happens to file permissions when you move files from "Shared with me" to "My Drive."
Shortcut vs. Copy: Permission differences
| Aspect | Shortcut (Add to My Drive) | Copy |
|---|---|---|
| Ownership | Original owner retains ownership | You become the owner |
| Access if original is deleted | Access lost | Access retained |
| Storage space used | Negligible | Counts toward your quota |
| Editing permissions | Based on original sharing settings | Full control |
| Updates to original file | Reflected in your shortcut | Not reflected in your copy |
Checking File Permissions
To check the permissions of a file after moving it:
- Right-click on the file in your Drive
- Select "Share" or "Manage access"
- Review who has access and what level of permissions they have
- Make changes if necessary (if you have permission)
Organizing Moved Files in Your Drive
After moving files to your Drive, organizing them effectively will help you find them easily later.
Creating a Folder Structure
Consider creating a logical folder structure for your moved files:
- Click "New" in Google Drive
- Select “Folder” and name it appropriately
- Create subfolders if needed
- Move your shared files into these folders
Using Color Coding
Google Drive allows you to color-code folders for visual organization:
- Right-click on a folder
- Select "Change color"
- Choose a color that helps you identify the folder's purpose
Adding Stars to Important Files
For quick access to important files:
- Right-click on the file
- Select "Add to Starred"
- Access these files quickly from the "Starred" section in the sidebar
Batch Processing Multiple Files
Need to move several files at once? Here's how to do it efficiently:
Selecting Multiple Files
To select multiple files in Google Drive:
- Hold Ctrl (or Command on Mac) and click each file you want to select
- Or click and drag to create a selection box around multiple files
- Use Shift+click to select a range of files
Moving Multiple Files at Once
Once you've selected multiple files:
- Right-click on any of the selected files
- Choose "Add to My Drive" or "Move to"
- Select the destination
- Complete the action
Creating Multiple Copies
To create copies of multiple files:
- Select all the files you want to copy
- Right-click and select "Make a copy"
- Google Drive will create copies of all selected files in your “My Drive”
Troubleshooting Common Issues
Sometimes you might encounter issues when moving files. Here are solutions to common problems:
Can't Add to My Drive
If the "Add to My Drive" option is missing:
- Check if you have at least "Viewer" access to the file
- Try refreshing the page
- Use the "Make a copy" option instead
- Contact the file owner to adjust sharing permissions
Files Disappearing After Moving
If files seem to disappear after moving:
- Check if you moved a shortcut that the owner later deleted
- Look in the "Recent" section to find recently accessed files
- Search for the filename in the search bar
- Check the "Trash" to see if it was accidentally deleted
Storage Limit Reached
If you receive storage limit warnings:
- Use shortcuts instead of copies when possible
- Delete unnecessary files from your Drive
- Empty your Trash to free up space
- Consider upgrading your Google One storage plan
Best Practices for Managing Shared Files
To maintain an organized Drive with shared files, follow these best practices:
Regular Clean-up
Schedule regular clean-ups of your Drive:
- Review shared files monthly
- Move important shared files to your Drive
- Remove shortcuts to files you no longer need
- Delete copies of shared files that are outdated
Naming Conventions
Develop consistent naming conventions:
- Use descriptive filenames
- Include dates in filenames for version control
- Add prefixes or tags for easy searching
- Rename copied files to remove the "Copy of" prefix
Backup Important Shared Files
For critical shared documents:
- Make copies rather than shortcuts
- Download important files as backups
- Consider using Google Takeout for bulk downloads
- Regularly check that you still have access to important shared files
Advanced Tips for Power Users
If you work extensively with shared files, these advanced tips will help you manage them more efficiently:
Using Google Drive Search Operators
Use these search operators to find specific shared files:
- Type "to:me" to find files shared directly with you
- Use "owner:email@address.com" to find files from a specific person
- Add "before:YYYY-MM-DD" or "after:YYYY-MM-DD" to search by date
- Type "type:document" (or spreadsheet, presentation, etc.) to filter by file type
Keyboard Shortcuts
Save time with these keyboard shortcuts:
- Shift+Z: Add to Drive/Move to folder
- Ctrl+C, then Ctrl+V: Copy a file
- N: Create a new folder
- S: Star/unstar a file
- /: Search Drive
Using Google Drive Add-ons
Explore these add-ons to enhance your Drive experience:
- Drive File Explorer: For better file management
- Sort My Files: To automatically organize files
- Backup and Sync: For syncing files to your computer
- DocHub: For editing PDFs directly in Drive
Quick Tip to ensure your videos never go missing
Videos are precious memories and all of us never want to lose them to hard disk crashes or missing drives. PicBackMan is the easiest and simplest way to keep your videos safely backed up in one or more online accounts.

Simply download PicBackMan (it's free!) , register your account, connect to your online store and tell PicBackMan where your videos are - PicBackMan does the rest, automatically. It bulk uploads all videos and keeps looking for new ones and uploads those too. You don't have to ever touch it.
Conclusion
Moving files from “Shared with me” to “My Drive” doesn't have to be complicated. Whether you prefer the simple right-click method, drag and drop, making copies, using the “Move to” function, or managing files on mobile, Google Drive offers multiple ways to organize your shared files effectively.
Remember that shortcuts preserve storage space but maintain the original ownership, while copies give you full control but use your storage quota. Choose the method that best fits your needs, and keep your Drive organized with regular maintenance and consistent naming conventions.
By mastering these five methods, you'll have a more organized Google Drive with all your important files easily accessible, whether they were originally shared with you or created by you.
Frequently Asked Questions
1. Will moving a file from “Shared with me” to “My Drive” notify the original owner?
No, the original owner won't receive any notification when you add a file to your Drive or make a copy. They'll only see changes if you edit the original shared file (assuming you have edit permissions).
2. Do files moved from “Shared with me” count against my Google Drive storage limit?
It depends on the method you use. If you create a shortcut (using "Add to My Drive"), it doesn't use additional storage. If you make a copy, the new file will count against your storage quota.
3. What happens if the original owner deletes a file after I've added it to my Drive?
If you only created a shortcut (using "Add to My Drive"), you'll lose access to the file when the owner deletes it. If you made a copy, your copy will remain intact regardless of what happens to the original.
4. Can I move files from “Shared with me” if I only have viewer access?
Yes, you can add files to your Drive even if you only have viewer access. However, you won't be able to edit them unless the owner grants you edit permissions. You can always make a copy, which you'll have full control over.
5. Is there a limit to how many shared files I can move to my Drive?
There's no specific limit to how many shared files you can add to your Drive. However, if you're making copies, you're limited by your available Google Drive storage. Google accounts typically come with 15GB of free storage across Gmail, Google Drive, and Google Photos.


