Menu
Start Free $129 Lifetime
Why is it the #1 bulk uploader?
- Insanely fast!
- Maintains folder structure.
- 100% automated upload.
- Supports RAW files.
- Privacy default.
How can you get started?
Download PicBackMan and start free, then upgrade to annual or lifetime plan as per your needs. Join 100,000+ users who trust PicBackMan for keeping their precious memories safe in multiple online accounts.
Trusted by users in 125+ countries.
“Your pictures are scattered. PicBackMan helps you bring order to your digital memories.”
How to Upload iMovie Videos to Google Drive?

In this digital age, videos have become an integral part of our lives, capturing and preserving precious moments.
iMovie, Apple's popular video editing software, allows users to create stunning videos with ease. However, storing and sharing these videos can sometimes be a challenge.
This article will guide you through the process of uploading iMovie videos to Google Drive, a cloud storage service that offers convenience and accessibility.
iMovie is a powerful video editing tool available on Mac and iOS devices. With its user-friendly interface and advanced features, users can create professional-looking videos.
On the other hand, Google Drive provides a reliable and secure platform for storing and sharing files in the cloud. By uploading iMovie videos to Google Drive, you can easily access them from anywhere and share them with others effortlessly.
Understanding iMovie and Google Drive
Before we dive into the process of uploading iMovie videos to Google Drive, let's take a moment to understand these two tools better. iMovie is an Apple-exclusive video editing software that allows users to edit and create videos using various media files, effects, and transitions.
Google Drive, on the other hand, is a cloud storage service provided by Google, offering users a convenient way to store and access their files from any device with an internet connection.
Why would you want to upload iMovie videos to Google Drive?
There are several reasons why you might want to upload your iMovie videos to Google Drive. Firstly, Google Drive provides a reliable backup solution for your videos. By storing them in the cloud, you can ensure that your videos are safe even if your device is lost, damaged, or stolen.
Additionally, Google Drive allows you to easily share your videos with others, whether they have a Google account or not. You can also collaborate on video projects by granting others access to specific folders or files.
Exporting iMovie videos
Before you can upload your iMovie videos to Google Drive, you need to export them from iMovie. The process may vary slightly depending on whether you're using iMovie on a Mac or iOS device.
Exporting in iMovie for Mac
- Open iMovie on your Mac.
- Select the project or video you want to export.
- Go to the "File" menu and choose "Share" followed by "File."
- In the export settings, choose the desired video format and quality.
- Select a location on your Mac to save the exported video.
- Click "Next" and then "Save" to begin the export process.
Backup & Transfer your Photos in Minutes
Trusted by users in 125+ countries.
Exporting in iMovie for iOS
- Open iMovie on your iOS device.
- Tap on the project or video you want to export.
- Tap on the share icon, usually represented by a box with an arrow pointing upward.
- Select "Save Video."
- Choose the video quality you prefer.
- Tap "Save Video" to export the video to your device's camera roll.
Setting up Google Drive
To upload your iMovie videos to Google Drive, you need to have a Google account and the Google Drive app installed on your device.
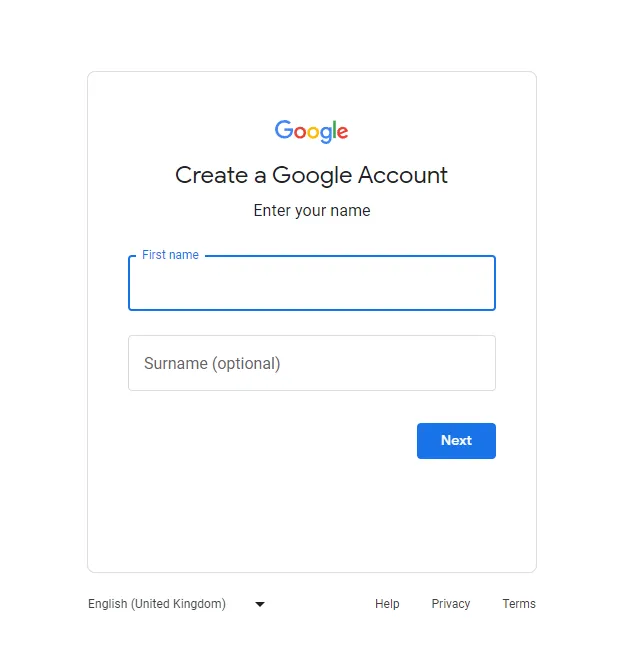
Creating a Google account
If you don't have a Google account yet, follow these steps to create one:
- Visit the Google account creation page.
- Fill in the required information, including your name, desired email address, and password.
- Complete the verification process, which may involve providing a phone number or alternative email address.
- Once your account is created, you can proceed to set up Google Drive.
Installing Google Drive on your device
To install the Google Drive app on your device, follow these steps:
- Open your device's app store (e.g., App Store for iOS or Google Play Store for Android).
- Search for "Google Drive" and select the official app.
- Tap on the "Install" or "Get" button to download and install the app on your device.
Uploading iMovie videos to Google Drive
Once you have iMovie videos exported and Google Drive set up, you can proceed with uploading the videos to Google Drive. There are two main methods you can use: the web interface or the Google Drive desktop app.
Using the web interface
- Open a web browser and go to the Google Drive website.
- Sign in with your Google account credentials.
- Click on the "+ New" button and select "File upload" from the drop-down menu.
- Browse your computer or device for the exported iMovie video and select it.
- Click "Open" to start the upload process.
- Wait for the upload to complete, and your iMovie video will be available in Google Drive.
Using the Google Drive desktop app
If you prefer a more seamless integration with your computer's file system, you can use the Google Drive desktop app. Follow these steps to upload iMovie videos:
- Open the Google Drive app on your computer.
- Sign in with your Google account credentials.
- Locate the folder where you want to upload your iMovie videos or create a new folder.
- Drag and drop the exported iMovie video files into the Google Drive folder.
- Wait for the files to sync with Google Drive, indicating that they have been successfully uploaded.
Organizing and managing iMovie videos in Google Drive
To keep your iMovie videos organized and easily accessible in Google Drive, you can utilize various organizational features.
Creating folders
Folders are a great way to categorize and group your iMovie videos. To create a folder in Google Drive, follow these steps:
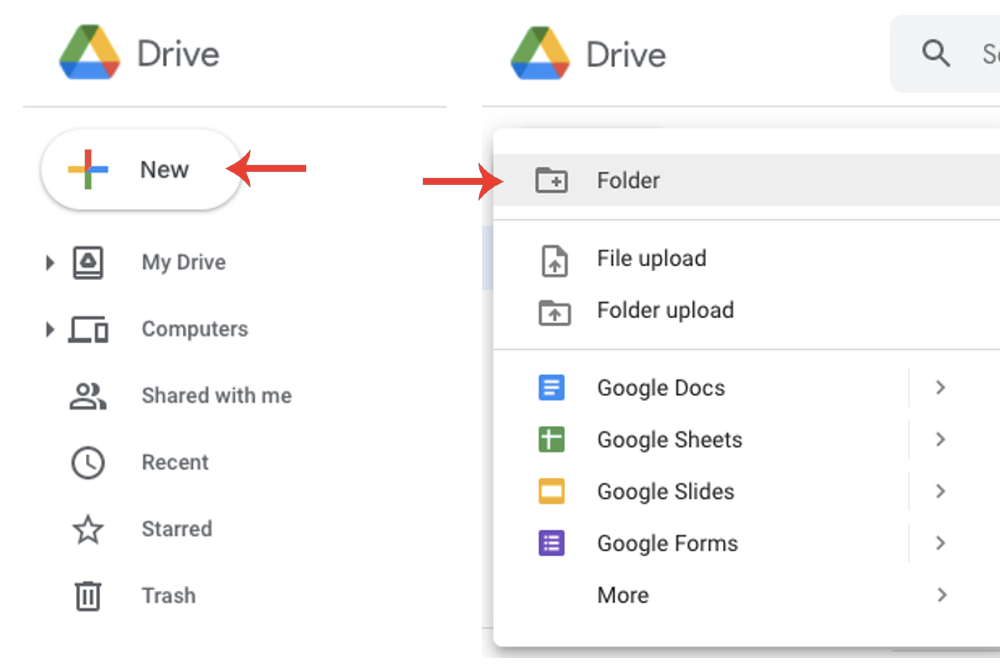
- Open Google Drive in a web browser or the Google Drive app.
- Navigate to the location where you want to create the folder.
- Click on the "+ New" button and select "Folder" from the drop-down menu.
- Provide a name for the folder and press "Enter" to create it.
- You can then move your iMovie videos into the folder by dragging and dropping them.
Renaming and moving files
If you need to rename or move your iMovie video files within Google Drive, follow these steps:
- Locate the file you want to rename or move in Google Drive.
- Right-click on the file and select "Rename" or "Move" from the context menu.
- Enter the new name or choose the destination folder, respectively.
- Press "Enter" or click "Move" to apply the changes.
Sharing and collaborating on videos
Google Drive allows you to easily share your iMovie videos with others and collaborate on them. To share a video, follow these steps:
- Right-click on the video file in Google Drive and select "Share" from the context menu.
- Enter the email addresses or Google accounts of the people you want to share the video with.
- Choose the level of access you want to grant them (e.g., view-only, comment, or edit).
- Click "Send" to share the video. The recipients will receive an email notification with access to the shared video.
Accessing iMovie videos from Google Drive
Once your iMovie videos are uploaded to Google Drive, you can access them from various devices and platforms.
Web interface
To access your iMovie videos through the Google Drive web interface, follow these steps:
- Open a web browser and go to the Google Drive website (drive.google.com).
- Sign in with your Google account credentials if prompted.
- Navigate to the location where your iMovie videos are stored.
- Click on the video file to preview or download it.
Google Drive app on mobile devices
To access your iMovie videos using the Google Drive app on your mobile device, follow these steps:
- Open the Google Drive app on your iOS or Android device.
- Sign in with your Google account credentials if prompted.
- Locate the folder where your iMovie videos are stored.
- Tap on the video file to preview or download it.
Syncing with your computer
If you have the Google Drive desktop app installed on your computer, your iMovie videos will be synced and accessible through the file system. Simply navigate to the Google Drive folder on your computer to find and access your videos.
Quick Tip to ensure your videos never go missing
Videos are precious memories and all of us never want to ever lose them to hard disk crashes or missing drives.
PicBackMan is the easiest and simplest way to keep your videos safely backed up in one or more online accounts. Simply download PicBackMan (it's free!), register your account, connect to your online store and tell PicBackMan where your videos are - PicBackMan does the rest, automatically. It bulk uploads all videos and keeps looking for new ones and uploads those too. You don't have to ever touch it.
You can install PicBackMan's Google Drive uploader for Mac from the website and start backing up photos and videos.
Tips for optimizing iMovie videos for Google Drive
To ensure optimal performance and storage efficiency when uploading iMovie videos to Google Drive, consider the following tips:
File formats and sizes
Google Drive supports a wide range of video file formats, including MP4, MOV, AVI, and more. Export your iMovie videos in a compatible format for seamless playback on various devices.
Keep in mind that larger video files take longer to upload and may consume more storage space. Consider compressing your videos or adjusting the export settings to balance file size and video quality.
Video compression
If you encounter upload issues due to large file sizes or slow internet connections, consider compressing your iMovie videos before uploading them to Google Drive. There are various video compression tools available online that can help reduce file size without significant loss in quality.
Naming conventions
To easily identify and search for your iMovie videos in Google Drive, use descriptive and consistent naming conventions. Include relevant information such as the video's title, date, and any important keywords.
Troubleshooting common issues
While uploading iMovie videos to Google Drive is usually straightforward, you may encounter some common issues. Here are a few troubleshooting tips:
File upload errors
If you encounter errors during the upload process, ensure that your internet connection is stable and try again. Additionally, check if the file format and size comply with Google Drive's requirements. If the issue persists, try uploading the video from a different device or browser.
Playback issues
If you experience playback issues with your iMovie videos in Google Drive, ensure that you have a compatible video player installed on your device. If the video still doesn't play correctly, consider re-exporting the video from iMovie using different settings or formats.
Conclusion
Uploading iMovie videos to Google Drive provides a convenient and accessible solution for storing and sharing your creations. By following the steps outlined in this article, you can easily export your iMovie videos, set up Google Drive, and upload your videos.
Additionally, organizing and managing your videos in Google Drive ensures easy access and collaboration. Remember to optimize your videos for file formats, sizes, and compression to enhance the uploading process. Enjoy the benefits of having your iMovie videos readily available in the cloud with Google Drive.
FAQs
Why can't I upload files from my Mac to Google Drive?
If you're experiencing difficulties uploading files from your Mac to Google Drive, there could be several reasons. First, ensure that you have a stable internet connection. Check if you have sufficient storage space in your Google Drive account. Additionally, check if you have the latest version of the Google Drive app installed on your Mac. If the issue persists, try restarting your computer or contacting Google Drive support for further assistance.
How do I upload videos from my iPhone to Google Drive?
To upload videos from your iPhone to Google Drive, follow these steps:
- Install the Google Drive app from the App Store if you haven't already.
- Open the Google Drive app on your iPhone.
- Sign in to your Google account or create a new one.
- Tap the "+" icon to create a new file.
- Select "Upload" and choose the videos you want to upload from your iPhone's camera roll.
- Wait for the upload to complete, and your videos will be available in Google Drive.
How long does it take to upload a 1GB video?
The time it takes to upload a 1GB video to Google Drive depends on various factors, including your internet connection speed and the stability of the connection. In general, a 1GB video may take several minutes to an hour or more to upload, depending on these factors. It's recommended to have a fast and reliable internet connection for faster uploads.
What is the longest video you can upload to Google Drive?
The maximum file size you can upload to Google Drive depends on your account type. For free Google accounts, the limit is 15GB. However, if you have a paid Google Drive subscription, you can upload files larger than 15GB. The specific limit varies depending on the subscription plan you choose. Be aware that larger video files may take longer to upload and may consume more storage space.
How long does it take to upload a 3-minute video to Google Drive?
The time it takes to upload a 3-minute video to Google Drive depends on factors such as the file size and your internet connection speed. Smaller file sizes and faster internet connections will generally result in quicker uploads. As a rough estimate, a 3-minute video with a standard file size may take a few minutes to upload with a typical internet connection.
Is Google Drive good for saving videos?
Yes, Google Drive is an excellent option for saving videos. It provides a secure and reliable cloud storage solution, allowing you to store and access your videos from anywhere with an internet connection. Google Drive also offers various organizational features, such as folder creation and file management, making it easy to keep your videos organized and easily accessible. Additionally, you can easily share videos stored in Google Drive with others, providing a convenient way to collaborate or distribute your videos.


