Menu
Start Free $129 Lifetime
Why is it the #1 bulk uploader?
- Insanely fast!
- Maintains folder structure.
- 100% automated upload.
- Supports RAW files.
- Privacy default.
How can you get started?
Download PicBackMan and start free, then upgrade to annual or lifetime plan as per your needs. Join 100,000+ users who trust PicBackMan for keeping their precious memories safe in multiple online accounts.
Trusted by users in 125+ countries.
“Your pictures are scattered. PicBackMan helps you bring order to your digital memories.”
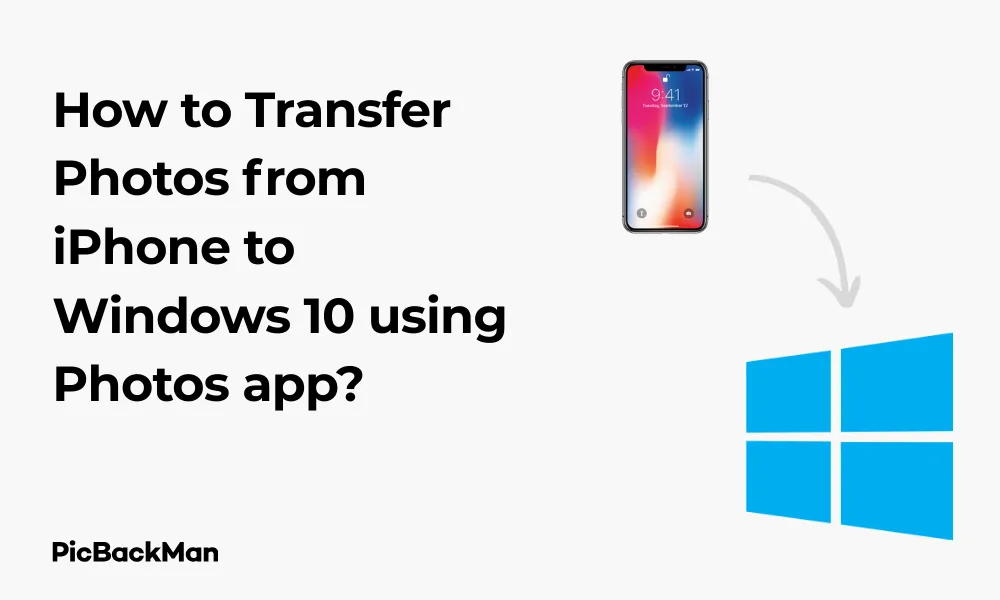
How to Transfer Photos from iPhone to Windows 10 using Photos app?

Transferring photos from your iPhone to your Windows 10 PC doesn't have to be complicated. With the Windows 10 Photos app, you can easily import your precious memories and organize them on your computer. This guide walks you through the entire process step by step, helping you back up your photos without needing third-party software or cloud services.
Whether you have hundreds of vacation pictures or just a few special snapshots, this method works for all iPhone users with Windows 10 computers. Let's get started with this straightforward approach to photo transfers.
What You'll Need Before Starting
- An iPhone with the photos you want to transfer
- A Windows 10 PC with the Photos app installed (comes pre-installed on Windows 10)
- A USB cable to connect your iPhone to your PC (preferably the original Lightning cable)
- Your iPhone passcode (if you have one set up)
Preparing Your iPhone for Photo Transfer
Before connecting your iPhone to your Windows 10 PC, there are a few things you should check to make sure the transfer process goes smoothly:
1. Unlock Your iPhone
Make sure your iPhone is turned on and unlocked. Your PC won't be able to access your photos if your device is locked with a passcode.
2. Trust Your Computer
When you connect your iPhone to a Windows PC for the first time, you'll see a "Trust This Computer?" prompt on your iPhone. You must tap "Trust" and enter your passcode to allow the computer to access your photos.
3. Check Your USB Cable
Use a working Lightning to USB cable. Damaged cables can cause connection issues or interrupted transfers. The original cable that came with your iPhone is usually the most reliable option.
Step-by-Step Guide to Transfer Photos Using Windows 10 Photos App
Step 1: Connect Your iPhone to Your Windows 10 PC
Take your Lightning cable and connect one end to your iPhone and the other end to a USB port on your Windows 10 PC. Make sure to use a direct connection to your computer rather than through a hub, which can sometimes cause connection issues.
Step 2: Unlock Your iPhone and Trust Your Computer
Once connected, unlock your iPhone if it's not already unlocked. You'll likely see a prompt asking if you want to "Trust This Computer." Tap "Trust" and enter your passcode if prompted. This step is crucial for allowing your Windows 10 PC to access the photos on your iPhone.
Step 3: Open the Photos App on Windows 10
Now it's time to work with the Photos app on your Windows 10 computer:
- Click on the Start menu (Windows icon in the bottom left)
- Type "Photos" in the search bar
- Click on the Photos app icon that appears in the search results
The Photos app should open on your screen, ready for the next step.
Step 4: Import Photos from Your iPhone
With the Photos app open, follow these steps to import your photos:
- Click on "Import" in the top-right corner of the Photos app
- Select "From a USB device" from the dropdown menu
- The app will detect your iPhone and start looking for photos and videos
- Wait while Windows searches for media on your iPhone (this may take a few moments depending on how many photos you have)
Step 5: Select the Photos You Want to Import
After the Photos app finishes scanning your iPhone, you'll see all the available photos and videos that can be imported:
- By default, all new items (photos not already on your PC) will be selected
- You can click "Clear selection" if you want to start fresh and manually select specific photos
- Browse through the thumbnails and check the boxes of photos you want to import
- Use the "Select all" option if you want to import everything
Step 6: Choose Import Destination and Settings
Before starting the import, you can customize where and how your photos will be saved:
- Click on the "Import settings" link if you want to change the default destination folder
- Choose whether you want to import to the default Pictures folder or select a custom location
- You can also choose if you want Windows to organize your photos into folders by date
Step 7: Start the Import Process
Once you've selected the photos and configured your settings:
- Click the "Import" button to begin transferring the selected photos
- A progress bar will appear showing how many photos have been imported
- Keep both devices connected until the import is complete
Step 8: View Your Imported Photos
After the import is complete, the Photos app will show you a summary of the imported items:
- Click on "See what I imported" to view the photos in the Photos app
- Alternatively, you can browse to the folder where you saved the photos using File Explorer
- The default location is usually: This PC > Pictures > From [your iPhone's name]
Troubleshooting Common Issues When Transferring Photos
Sometimes things don't go as planned. Here are solutions to common problems you might encounter:
iPhone Not Recognized by Windows 10
If your Windows 10 PC doesn't recognize your iPhone, try these fixes:
- Restart both your iPhone and Windows 10 PC
- Try a different USB port on your computer
- Use a different Lightning cable if available
- Make sure your iPhone is unlocked during the entire process
- Check if you need to update iTunes or install Apple drivers
Trust Prompt Not Appearing on iPhone
If the "Trust This Computer" prompt doesn't appear on your iPhone:
- Disconnect and reconnect your iPhone
- Go to iPhone Settings > General > Reset > Reset Location & Privacy (note that this will reset all app privacy settings)
- Make sure your iPhone screen is not locked during connection
Photos App Not Finding Any Photos
If the Photos app scans your iPhone but doesn't find any photos:
- Check if your photos are stored in iCloud instead of on your device (Settings > [Your Name] > iCloud > Photos)
- If using iCloud Photos with "Optimize Storage" turned on, photos may need to be downloaded to your device first
- Try restarting the Photos app or your computer
Import Process Is Very Slow
If the photo import is taking too long:
- Try connecting to a USB 3.0 port (usually blue) if your computer has one
- Close other applications running on your PC to free up resources
- Import smaller batches of photos instead of all at once
- Check if your iPhone needs a software update
Alternative Methods for Transferring Photos from iPhone to Windows 10
While the Photos app is convenient, there are other ways to transfer your iPhone photos to Windows 10:
Using File Explorer (Windows Explorer)
You can bypass the Photos app and use File Explorer directly:
- Connect your iPhone to your PC and trust the computer
- Open File Explorer (press Windows key + E)
- Look for your iPhone in the devices section
- Double-click on your iPhone to open it
- Navigate to Internal Storage > DCIM
- You'll see folders containing your photos (usually named like "100APPLE")
- Select the photos you want and copy/paste them to your desired location on your PC
Using iCloud Photos
If you use iCloud Photos, you can download your photos through a web browser:
- On your Windows 10 PC, open a web browser
- Go to iCloud.com and sign in with your Apple ID
- Click on "Photos"
- Select the photos you want to download
- Click the download icon (cloud with arrow) to save them to your PC
Using Email or Messaging Apps
For a small number of photos, you can email them to yourself or use messaging apps:
- On your iPhone, select the photos you want to transfer
- Tap the share icon and choose email or a messaging app
- Send the photos to yourself
- On your Windows 10 PC, open the email or message and download the photos
Comparison of Different Transfer Methods
| Transfer Method | Speed | Ease of Use | Batch Transfer | Requires Internet |
|---|---|---|---|---|
| Windows 10 Photos App | Fast | Very Easy | Yes | No |
| File Explorer | Fast | Moderate | Yes | No |
| iCloud.com | Depends on internet speed | Easy | Yes | Yes |
| Email/Messaging | Slow | Easy | Limited | Yes |
| iCloud for Windows app | Depends on internet speed | Easy | Yes | Yes |
Organizing Your Photos After Import
Once you've transferred your photos to Windows 10, you might want to organize them for easy access:
Using Albums in the Photos App
The Windows 10 Photos app allows you to create albums to organize your photos:
- Open the Photos app
- Click on "Albums" in the top menu
- Click "New album"
- Select the photos you want to include
- Give your album a name and click "Create"
Creating Folders in File Explorer
You can also organize your photos using traditional folders:
- Open File Explorer and navigate to where your photos are stored
- Right-click in an empty space and select New > Folder
- Name the folder (e.g., "Vacation 2023" or "Family Photos")
- Drag and drop photos into the appropriate folders
Using Tags and Metadata
Windows 10 allows you to add tags to your photos for easier searching:
- Right-click on a photo in File Explorer
- Select "Properties"
- Go to the "Details" tab
- Add tags, titles, or other metadata
- Click "OK" to save the changes
Quick Tip to ensure your videos never go missing
Videos are precious memories and all of us never want to lose them to hard disk crashes or missing drives. PicBackMan is the easiest and simplest way to keep your videos safely backed up in one or more online accounts.

Simply download PicBackMan (it's free!), register your account, connect to your online store and tell PicBackMan where your videos are - PicBackMan does the rest, automatically. It bulk uploads all videos and keeps looking for new ones and uploads those too. You don't have to ever touch it.
Backing Up Your Photos After Transfer
After transferring your precious memories to your Windows 10 PC, it's important to back them up:
Using OneDrive
Windows 10 comes with OneDrive integration for easy cloud backup:
- Make sure OneDrive is set up on your PC
- Move or copy your photo folders to your OneDrive folder
- Wait for the files to sync to the cloud (check the OneDrive icon in the taskbar)
Using External Hard Drives
Physical backups provide extra security:
- Connect an external hard drive to your PC
- Open File Explorer and locate your photos
- Copy the photos to the external drive
- Safely eject the drive when finished
- Store the drive in a safe location
Automated Backup Solutions
Windows 10 has built-in backup options:
- Go to Settings > Update & Security > Backup
- Set up "Back up files to OneDrive" or use the legacy "Backup and Restore (Windows 7)" option
- Select your photo folders in the backup settings
- Set a regular backup schedule
Tips for Managing iPhone Storage After Transfer
After successfully transferring your photos to Windows 10, you might want to free up space on your iPhone:
Deleting Photos Safely After Transfer
Make sure your photos are safely on your PC before removing them from your iPhone:
- Verify that all photos transferred correctly by checking them on your PC
- On your iPhone, open the Photos app
- Select the photos you've transferred and confirmed are on your PC
- Tap the trash icon to delete them
- Remember to empty the "Recently Deleted" album to free up space (Photos app > Albums > Recently Deleted > Select All > Delete All)
Using iPhone Storage Optimization
If you use iCloud Photos, you can optimize iPhone storage:
- Go to Settings > [Your Name] > iCloud > Photos
- Turn on "iCloud Photos" if it isn't already
- Select "Optimize iPhone Storage" to keep smaller versions of photos on your device while full-resolution versions stay in iCloud
Regularly Transferring New Photos
Get into the habit of regularly transferring new photos to keep your iPhone storage manageable:
- Set a regular schedule (weekly or monthly) to transfer new photos
- Use the "Select photos from" date range option in the Windows 10 Photos app to only import new photos
- Delete transferred photos from your iPhone after confirming they're safely on your PC
Frequently Asked Questions
1. Why can't my Windows 10 PC detect my iPhone?
If your PC isn't detecting your iPhone, try these solutions: restart both devices, use a different USB port or cable, make sure your iPhone is unlocked, and check if you need to update or install Apple drivers on your PC. Sometimes installing or updating iTunes can also help with detection issues.
2. Do I need iTunes installed to transfer photos using the Windows 10 Photos app?
No, you don't need iTunes installed to use the Windows 10 Photos app for transferring photos from your iPhone. The Photos app uses Windows' built-in MTP (Media Transfer Protocol) to communicate with your iPhone. However, having iTunes installed sometimes helps with driver issues if your iPhone isn't being recognized.
3. Will transferring photos from my iPhone to Windows 10 reduce their quality?
No, transferring photos using the Windows 10 Photos app or File Explorer maintains the original quality of your photos. The images are copied exactly as they are stored on your iPhone, preserving their resolution and quality. No compression is applied during the transfer process.
4. Can I transfer Live Photos from iPhone to Windows 10 and keep them animated?
When you transfer Live Photos from iPhone to Windows 10 using the Photos app, you'll get the still image portion of the Live Photo. The motion part isn't viewable in Windows by default. To preserve the full Live Photo functionality, you would need to use iCloud Photos or export them as short videos using a third-party app on your iPhone first.
5. How can I transfer photos from Windows 10 back to my iPhone?
To transfer photos from Windows 10 back to your iPhone, the easiest method is to use iCloud Photos (if you have it set up), iTunes sync, or the Photos feature in iTunes. Alternatively, you can email photos to yourself, use cloud storage apps like OneDrive or Dropbox, or use third-party transfer software. The Windows 10 Photos app doesn't support transferring photos to your iPhone directly.
Conclusion
Transferring photos from your iPhone to a Windows 10 PC using the Photos app is a straightforward process that doesn't require any third-party software. By following the steps outlined in this guide, you can easily back up your precious memories and free up space on your iPhone.
The Windows 10 Photos app provides a user-friendly interface for importing, organizing, and viewing your photos. While there are alternative methods available, such as using File Explorer or cloud services, the Photos app offers the most integrated experience for Windows 10 users.
Remember to regularly back up your photos after transferring them to your PC, whether through cloud storage solutions like OneDrive or physical backups on external hard drives. This ensures your memories remain safe even if something happens to your original devices.


