Menu
Start Free $129 Lifetime
Why is it the #1 bulk uploader?
- Insanely fast!
- Maintains folder structure.
- 100% automated upload.
- Supports RAW files.
- Privacy default.
How can you get started?
Download PicBackMan and start free, then upgrade to annual or lifetime plan as per your needs. Join 100,000+ users who trust PicBackMan for keeping their precious memories safe in multiple online accounts.
Trusted by users in 125+ countries.
“Your pictures are scattered. PicBackMan helps you bring order to your digital memories.”
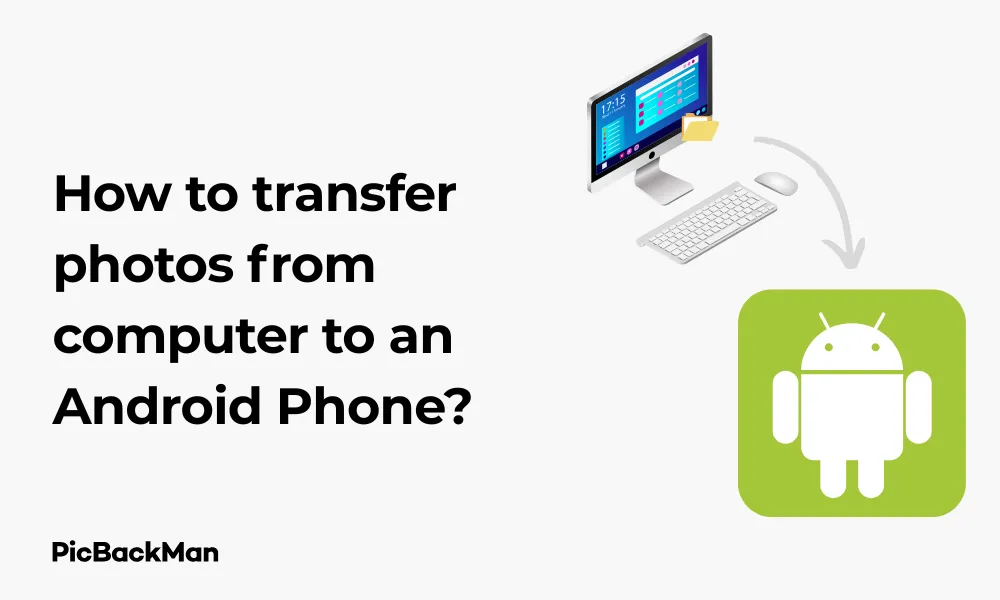
How to transfer photos from computer to an Android Phone?

Need to move your precious photos from your computer to your Android phone? Whether you want to share memories with friends, have your favorite pictures on the go, or free up some space on your PC, transferring photos to your Android device is a simple process. In this guide, I'll walk you through several reliable methods to get those pictures onto your phone without any hassle.
Transferring photos doesn't have to be complicated. With multiple options available, you can choose the method that works best for your situation. Let's explore the easiest and most efficient ways to move your photos from computer to Android.
Using a USB Cable to Transfer Photos
The most direct way to transfer photos from your computer to your Android phone is using a USB cable. This method offers fast transfer speeds and does not require an internet connection.
Step-by-Step USB Transfer Process
- Find the right USB cable for your phone (typically a USB-C, Micro USB, or older Mini USB)
- Connect your phone to your computer using the cable
- Unlock your Android phone's screen
- On your phone, pull down the notification panel and tap the “USB charging” notification
- Select "File Transfer" or "Transfer files" from the options
- On your computer, a file explorer window should open automatically (if not, open File Explorer on Windows or Finder on Mac)
- Navigate to your phone's storage in the file explorer
- Open the "DCIM" folder or create a new folder for your photos
- Drag and drop or copy and paste your photos from your computer to the phone folder
- Wait for the transfer to complete
- Safely disconnect your phone by ejecting it from your computer first
Troubleshooting USB Connection Issues
If your computer doesn't recognize your phone, try these quick fixes:
- Restart both your phone and computer
- Try a different USB cable (cables can wear out over time)
- Check for dust in your phone's charging port
- Make sure you've selected "File Transfer" mode on your phone
- Install or update Android drivers on your computer
Using Google Photos to Sync Pictures
Google Photos offers a seamless way to transfer photos without cables. This cloud-based solution works well if you have a reliable internet connection.
How to upload photos to Google Photos
- On your computer, visit photos.google.com and sign in with your Google account
- Click the "Upload" button in the top-right corner
- Select "Computer" from the dropdown menu
- Choose the photos you want to transfer
- Click "Open" to begin uploading
- Wait for the upload to complete (you'll see a progress indicator)
- On your Android phone, open the Google Photos app
- Make sure you're signed in with the same Google account
- Pull down to refresh the app if needed
- Your uploaded photos will appear in your library
- To save photos to your phone's storage, select the photo, tap the three-dot menu, and choose "Download"
Google Photos Storage Options
| Storage Type | Details | Best For |
|---|---|---|
| Free Storage | 15GB shared with Gmail and Google Drive | Small photo collections or temporary transfers |
| Google One (100GB) | $1.99/month | Medium photo libraries |
| Google One (200GB) | $2.99/month | Larger collections |
| Google One (2TB) | $9.99/month | Professional photographers or very large libraries |
Transferring Photos via Bluetooth
Bluetooth offers a wireless transfer option that doesn't require internet. While slower than other methods, it works well for transferring a few photos.
Bluetooth Transfer Steps
- Enable Bluetooth on both your computer and Android phone
- On your computer, go to Bluetooth settings and make it discoverable
- On your Android phone, go to Settings > Connected devices > Pair new device
- Select your computer from the list of available devices
- Confirm the pairing code on both devices
- On your computer, right-click the photos you want to transfer
- Select "Send to" or "Share" > "Bluetooth device"
- Choose your Android phone from the list
- On your phone, accept the incoming file transfer
- The photos will be saved to your Downloads folder or Bluetooth folder
Bluetooth Transfer Limitations
- Slower transfer speeds compared to USB or Wi-Fi
- Limited range (devices must be within about 30 feet of each other)
- Not ideal for large batches of photos or high-resolution images
- May disconnect if the devices move too far apart
Using Cloud Storage Services
Cloud storage services provide a convenient way to transfer photos without direct connections between devices.
Transferring with Dropbox
- Sign up for a Dropbox account if you don't have one
- Install Dropbox on your computer
- Create a folder for your photos in Dropbox
- Copy or move your photos into this folder
- Wait for the files to sync (look for the green checkmark)
- Install the Dropbox app on your Android phone
- Sign in with the same account
- Navigate to your photos folder
- Tap the three dots next to each photo and select “Save to device” or “Export”
- Choose a location on your phone to save the photos
Using OneDrive for Photo Transfer
- Sign in to OneDrive on your computer (built into Windows 10/11)
- Create a folder for your photos
- Upload your photos to this folder
- Install the OneDrive app on your Android phone
- Sign in with the same Microsoft account
- Browse to your photos folder
- Select the photos you want to save
- Tap the download icon to save them to your phone
Cloud Storage Service Comparison
| Service | Free Storage | Paid Plans | Advantages |
|---|---|---|---|
| Google Drive | 15GB | Starting at $1.99/month for 100GB | Integrates with Google Photos, already on most Android phones |
| Dropbox | 2GB | Starting at $9.99/month for 2TB | Reliable sync, easy to use |
| OneDrive | 5GB | Starting at $1.99/month for 100GB | Good for Windows users, Office integration |
| pCloud | 10GB | Lifetime plans available | One-time payment option, good privacy |
Using Email to Transfer Photos
Email works well for transferring a small number of photos quickly.
Email Transfer Process
- Open your email service on your computer
- Create a new email and address it to yourself
- Click the attachment button (paper clip icon)
- Select the photos you want to transfer
- Send the email
- On your Android phone, open your email app
- Open the email you sent
- Tap on the photo attachments
- Select "Download" or "Save"
- The photos will be saved to your Downloads folder or Gallery
Email Size Limitations
Most email services have attachment limits:
- Gmail: 25MB per email
- Outlook: 20MB per email
- Yahoo Mail: 25MB per email
Using a File Transfer App
Specialized file transfer apps can make moving photos between devices quick and painless.
Popular File Transfer Apps
1. SHAREit
- Install SHAREit on both your computer and Android phone
- Open SHAREit on both devices
- On your computer, select the photos you want to send
- Click "Send" and wait for your phone to appear in the device list
- On your phone, accept the incoming connection
- The photos will transfer directly and save to your SHAREit folder
2. Send Anywhere
- Install Send Anywhere on your computer and phone
- Open the app on your computer and select photos
- Click "Send" to generate a 6-digit code
- Open Send Anywhere on your phone
- Enter the 6-digit code
- Tap “Receive” to start the transfer
- Photos will save to your phone's gallery or Send Anywhere folder
3. AirDroid
- Install AirDroid on your Android phone
- Create an AirDroid account and sign in
- On your computer, visit web.airdroid.com
- Sign in with the same account
- Click on "Files" in the web interface
- Upload photos from your computer
- On your phone, open the AirDroid app
- Go to “Files” to find and save your transferred photos
Using an SD Card or External Storage
If your Android phone has a microSD card slot, you can use removable storage to transfer photos.
SD Card Transfer Method
- Insert your microSD card into your computer using a card reader
- Copy your photos to the microSD card
- Safely eject the card from your computer
- Power off your Android phone
- Insert the microSD card into your phone
- Power on your phone
- Open Files or My Files app on your phone
- Navigate to the SD card storage
- Find your photos
- Select and copy them to your phone's internal storage if desired
Using USB OTG (On-The-Go) Adapters
For phones without SD card slots, USB OTG adapters offer another physical transfer option:
- Get a USB OTG adapter that fits your phone's port (USB-C or Micro USB)
- Copy photos to a USB flash drive from your computer
- Connect the USB drive to your phone using the OTG adapter
- Open your phone's file manager app
- Navigate to the USB storage
- Select and copy photos to your phone's internal storage
Using Wi-Fi Direct
Wi-Fi Direct allows for fast wireless transfers without needing an internet connection or router.
Wi-Fi Direct Transfer Steps
- Make sure both your computer and Android phone support Wi-Fi Direct
- Download and install a Wi-Fi Direct file transfer app like Feem on both devices
- Open the app on both your computer and phone
- The devices should discover each other automatically
- Select your phone from the device list on your computer
- Choose the photos you want to transfer
- Click "Send" or "Transfer"
- Accept the incoming transfer on your phone
- The photos will be saved to your phone's download folder or the app's folder
Creating a Personal Hotspot
Another wireless option is to create a personal hotspot:
- On your Android phone, go to Settings > Network & Internet > Hotspot & tethering
- Enable "Wi-Fi hotspot"
- Note the hotspot name and password
- On your computer, connect to this hotspot
- Use a file transfer app like SHAREit or Feem to send photos
- Both devices need to have the same app installed
- Follow the app's instructions to complete the transfer
Using Messaging Apps
Popular messaging apps can be used to transfer photos quickly.
WhatsApp Transfer Method
- Install WhatsApp Web on your computer browser by visiting web.whatsapp.com
- Open WhatsApp on your phone and scan the QR code to link devices
- On WhatsApp Web, start a chat with yourself
- Click the attachment icon
- Select the photos you want to transfer
- Send the message
- On your phone, open the same chat
- Tap and hold on each photo
- Select "Save" or "Download"
Telegram for Photo Transfer
- Install Telegram on both your computer and phone
- Sign in with the same account on both devices
- Create a "Saved Messages" chat with yourself
- On your computer, drag and drop photos into this chat
- On your phone, open the Saved Messages chat
- Tap on each photo and select "Save to Gallery"
Messaging App Comparison for Photo Transfer
| App | Max File Size | Image Quality | Speed |
|---|---|---|---|
| 16MB per file | Compressed | Medium | |
| Telegram | 2GB per file | Can send uncompressed | Fast |
| Signal | 100MB per file | Slightly compressed | Medium |
| Facebook Messenger | 25MB per file | Compressed | Medium |
Using Manufacturer-Specific Apps
Many phone manufacturers offer their own transfer tools that work well with their devices.
Samsung Smart Switch
- Download and install Smart Switch on your computer
- Connect your Samsung phone to your computer with a USB cable
- Launch Smart Switch on your computer
- Click on "Backup" or "Transfer"
- Select "Photos" from the content categories
- Choose which photos to transfer
- Click "Transfer" to begin
- Wait for the process to complete
Xiaomi Mi PC Suite
- Download and install Mi PC Suite on your computer
- Connect your Xiaomi phone via USB
- Enable USB debugging on your phone if prompted
- Open Mi PC Suite
- Click on "Photos" or "Gallery"
- Select the photos you want to transfer
- Click "Import" to transfer them to your phone
Other Manufacturer Apps
- Google Pixel: Google's built-in file manager or Android File Transfer (Mac)
- Huawei: HiSuite
- OnePlus: OnePlus Switch
- Sony: Xperia Companion
- LG: LG Bridge
Using FTP Servers
For tech-savvy users, FTP (File Transfer Protocol) offers another way to transfer photos.
Setting Up an FTP Server
- Install an FTP server app like “FTP Server” on your Android phone
- Open the app and start the server
- Note the IP address and port shown in the app
- On your computer, open File Explorer (Windows) or Finder (Mac)
- In the address bar, type "ftp://[IP address]:[port]" (eg, ftp://192.168.1.100:2121)
- Enter the username and password if required (set in the FTP app)
- Navigate to the folder where you want to save photos
- Drag and drop photos from your computer to this folder
- The photos will be transferred to your phone
Choosing the Best Transfer Method
With so many options, how do you choose the best method for your needs?
Comparison of Transfer Methods
| Method | Speed | Ease of Use | Internet Required | Best For |
|---|---|---|---|---|
| USB Cable | Very Fast | Easy | No | Large batches of photos |
| Google Photos | Depends on the internet | Very Easy | Yes | Regular syncing of photos |
| Bluetooth | Slow | Medium | No | A few small photos |
| Cloud Storage | Depends on the internet | Easy | Yes | Photos you want to access everywhere |
| Medium | Very Easy | Yes | Just a few photos | |
| File Transfer Apps | Fast | Medium | Sometimes | Medium to large batches |
| SD Card | Fast | Medium | No | Phones with SD card slots |
| Wi-Fi Direct | Fast | Medium | No | Large transfers without cables |
Factors to Consider When Choosing a Method
- Number and size of photos : For many large photos, use USB, Wi-Fi Direct, or SD card
- Internet connection : Poor connection? Stick with cable or Bluetooth methods
- Phone storage space : Check available space before transferring
- Speed requirements : Need it fast? USB is typically fastest
- Technical comfort level : Simpler methods include USB, Google Photos, and email
Maintaining Photo Quality During Transfer
When transferring photos,
Quick Tip to ensure your videos never go missing


