Menu
Start Free $129 Lifetime
Why is it the #1 bulk uploader?
- Insanely fast!
- Maintains folder structure.
- 100% automated upload.
- Supports RAW files.
- Privacy default.
How can you get started?
Download PicBackMan and start free, then upgrade to annual or lifetime plan as per your needs. Join 100,000+ users who trust PicBackMan for keeping their precious memories safe in multiple online accounts.
Trusted by users in 125+ countries.
“Your pictures are scattered. PicBackMan helps you bring order to your digital memories.”
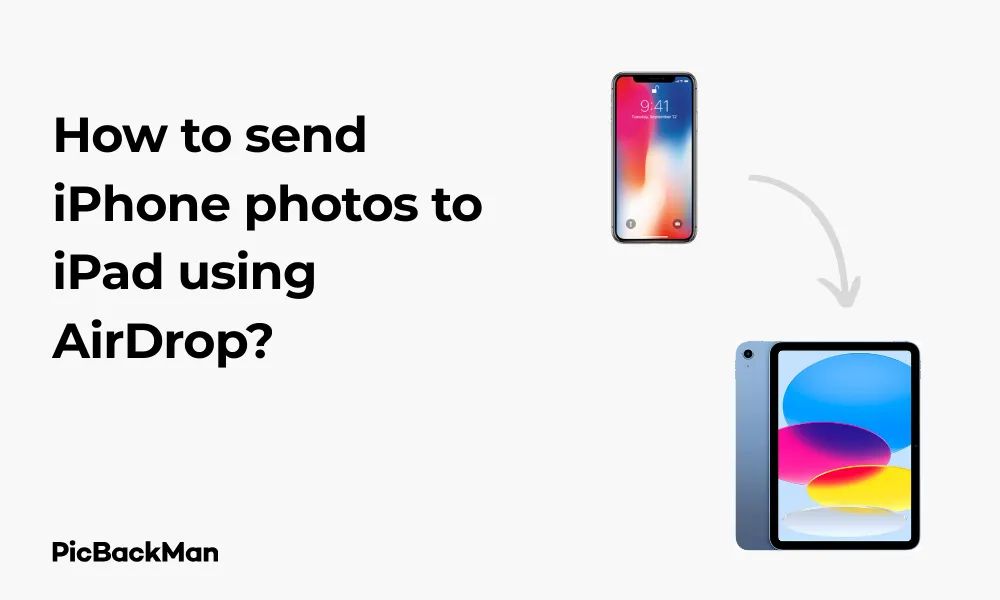
How to send iPhone photos to iPad using AirDrop?

Sharing photos between your Apple devices should be simple and straightforward. If you've ever wondered how to quickly transfer those beautiful iPhone snapshots to your iPad without dealing with cables, emails, or third-party apps, AirDrop is the answer you've been looking for. This wireless feature lets you send photos (and other files) between Apple devices in seconds, making it one of the most convenient tools in the Apple ecosystem.
In this guide, I'll walk you through everything you need to know about using AirDrop to send photos from your iPhone to your iPad. I'll cover the setup process, troubleshooting tips, and alternatives if AirDrop isn't working for you. Let's get started!
What is AirDrop and How does it work?
AirDrop is Apple's proprietary wireless transfer technology that uses Bluetooth to create a peer-to-peer WiFi network between devices. This connection allows you to share photos, videos, documents, and more between Apple devices without using cellular data or requiring an internet connection.
The technology works within a range of approximately 30 feet, making it perfect for transferring files between your own devices or sharing with nearby friends and family. What makes AirDrop especially useful is that it maintains the original quality of your photos during transfer, unlike some messaging apps that might compress images.
Requirements for Using AirDrop between iPhone and iPad
Before we jump into the steps, let's make sure your devices meet the requirements for using AirDrop:
- iPhone 5 or newer running iOS 7 or later
- iPad (4th generation), iPad mini, or newer running iOS 7 or later
- Both Bluetooth and Wi-Fi must be turned on (but you don't need to be connected to a Wi-Fi network)
- Both devices must be signed in with an Apple ID
- Personal Hotspot should be turned off
If your devices meet these requirements, you're ready to start using AirDrop!
Setting Up AirDrop on Your iPhone and iPad
Before sending photos, you need to make sure AirDrop is properly set up on both your iPhone and iPad. Here's how to do it:
Enabling AirDrop on iPhone (iOS 16/17)
- Swipe down from the top-right corner of your screen to open Control Center
- Press and hold the connectivity panel (where Wi-Fi, Bluetooth icons are grouped)
- Tap on "AirDrop"
- Choose your visibility option:
- "Receiving Off" - You won't receive any AirDrop requests
- “Contacts Only” - Only people in your contacts can see your device
- "Everyone" - All nearby Apple devices can see your device
Enabling AirDrop on iPad (iOS 16/17)
- Follow the same steps as on iPhone - swipe down from the top-right corner to access Control Center
- Press and hold the connectivity panel
- Tap "AirDrop"
- Select your preferred visibility setting
Important Note About AirDrop Settings
For the most reliable experience when transferring photos between your own devices, set AirDrop to “Contacts Only” on both devices. Make sure both devices are signed in with the same Apple ID or that your Apple IDs are in each other's contacts. If you're having trouble, temporarily switching to "Everyone" can help troubleshoot connection issues.
Step-by-Step Guide to Sending Photos from iPhone to iPad
Now that AirDrop is set up on both devices, let's go through the process of sending photos from your iPhone to your iPad:
Method 1: Sending a single photo
- On your iPhone, open the Photos app
- Find and tap on the photo you want to send
- Tap the share button (the square with an upward arrow) at the bottom left of the screen
- In the sharing menu, you'll see available AirDrop devices at the top. Look for your iPad's name
- Tap on your iPad's icon
- On your iPad, you'll see a notification asking you to accept the photo. Tap "Accept"
- The photo will be saved to your iPad's Photos app in the “Recents” album
Method 2: Sending multiple photos at once
- Open the Photos app on your iPhone
- Tap "Select" in the top right corner
- Tap on each photo you want to send to select them (you'll see a blue checkmark on selected photos)
- Tap the share icon at the bottom left
- Look for your iPad in the AirDrop section and tap on it
- On your iPad, tap “Accept” when prompted
- All selected photos will be transferred to your iPad
Method 3: Sending an Entire Album
- Open the Photos app on your iPhone
- Go to the "Albums" tab
- Open the album containing the photos you want to send
- Tap "Select" in the top right
- Tap "Select All" in the top left (or manually select the photos you want)
- Tap the share icon
- Choose your iPad from the AirDrop options
- Accept the transfer on your iPad
Pro Tip for Large Transfers
When sending a large number of photos (50+), make sure both devices have sufficient battery life and keep them relatively close to each other during the transfer. Also, be patient as large transfers can take several minutes to complete. Don't lock your screen or switch to another app during the transfer to prevent interruptions.
Where to Find Your Transferred Photos on iPad
After successfully sending photos from your iPhone to your iPad, you might wonder where they're stored. Here's where to find them:
- Open the Photos app on your iPad
- Tap on the “Recents” album (or “Camera Roll” in older iOS versions)
- Your transferred photos will appear there, typically at the end of the album based on the date they were received
If you've sent many photos and want to find them quickly, you can also check the "Imports" album, which sometimes groups recently received photos.
Troubleshooting AirDrop Issues
AirDrop is generally reliable, but you might encounter some issues. Here are common problems and their solutions:
AirDrop Not Working Between iPhone and iPad
1. Check Compatibility and Settings
- Verify both devices meet the minimum requirements
- Make sure Bluetooth and Wi-Fi are turned on for both devices
- Confirm both devices have AirDrop enabled and set to either "Contacts Only" or "Everyone"
- Ensure both devices are signed in with an Apple ID
2. Restart Bluetooth and Wi-Fi
- Open Control Center on both devices
- Turn off Bluetooth and Wi-Fi
- Wait 10 seconds
- Turn them back on
3. Restart Your Devices
Sometimes a simple restart can fix connectivity issues:
- Power off both your iPhone and iPad
- Wait 30 seconds
- Turn them back on
- Try AirDrop again
4. Reset Network Settings
If you're still having issues, you can try resetting network settings (note that this will remove saved Wi-Fi networks and passwords):
- Go to Settings > General > Reset (or Transfer or Reset [Device])
- Tap "Reset Network Settings"
- Enter your passcode
- Confirm the reset
Common Error Messages and Solutions
| Error Message | Possible Cause | Solution |
|---|---|---|
| "[Device] your photo has declined" | The receiving device did not accept the transfer | Make sure someone is ready to accept on the receiving device |
| No people found | AirDrop can't detect nearby devices | Check that both devices have AirDrop enabled and are within range |
| Transfer starts but fails to complete | Connection interrupted or device went to sleep | Keep devices awake, close together, and try sending fewer photos at once |
| Device appears but transfer won't start | Software issue or interference | Restart both devices and try again |
Alternative Methods to Transfer Photos from iPhone to iPad
If AirDrop isn't working for you, there are several other ways to transfer photos between your Apple devices:
1. iCloud Photos
iCloud Photos automatically syncs your photo library across all your Apple devices:
- On both devices, go to Settings > [your name] > iCloud > Photos
- Turn on "iCloud Photos"
- Wait for photos to sync (requires internet connection)
2. Shared Albums
Create a shared album to transfer specific photos:
- On your iPhone, select the photos you want to share
- Tap the share icon
- Scroll down and tap "Add to Shared Album"
- Create a new shared album or add to an existing one
- On your iPad, open Photos > Albums > Shared Albums to view and save the photos
3. Messages
Send photos through iMessage:
- Select photos on your iPhone
- Tap the share icon
- Choose Messages
- Send the photos to your own phone number or email associated with your Apple ID
- On your iPad, open the message and save the photos
4. Email
Email photos to yourself:
- Select photos on your iPhone
- Tap the share icon
- Choose Mail
- Send the email to yourself
- Open the email on your iPad and save the photos
Comparison of Transfer Methods
| Method | Speed | Internet Required | Maintains Quality | File Size Limits |
|---|---|---|---|---|
| AirDrop | Fast | No | Yes | None |
| iCloud Photos | Depends on internet speed | Yes | Yes | Limited by iCloud storage |
| Shared Albums | Medium | Yes | Slightly compressed | None |
| Messages | Medium | Yes | May compress | Limited per message |
| Slow | Yes | May compress | Usually 20-25MB per email |
Tips for Efficient Photo Sharing Between Apple Devices
Organizing Photos Before Transferring
Taking a few moments to organize your photos before transferring can save time and make the process more efficient:
- Create albums on your iPhone to group related photos
- Delete unwanted photos to avoid transferring unnecessary files
- Use the “Select” feature to select only the best shots from a series
Managing Storage Space
Photos can quickly fill up your device storage. Here are some tips to manage space:
- On your iPad, go to Settings > General > iPad Storage to see how much space photos are using
- Consider enabling “Optimize iPhone Storage” in iCloud settings if you use iCloud Photos
- Regularly delete duplicates or poor-quality photos
- Use the “Recently Deleted” album to permanently remove deleted photos and free up space
Batch processing for large libraries
If you need to transfer hundreds or thousands of photos:
- Transfer in smaller batches (50-100 photos at a time) for more reliable AirDrop transfers
- Consider using iCloud Photos for very large libraries
- Use a computer with iTunes or the Finder (macOS Catalina or later) as an intermediary for transferring large collections
Advanced AirDrop Features
Automatic Organization
When you AirDrop multiple photos to your iPad, the Photos app can help organize them:
- The Photos app will preserve the metadata, including date taken, location (if available), and any facial recognition data
- If you've named people in your iPhone photos, those names will carry over to your iPad if using the same Apple ID
- The search function can help you find transferred photos based on people, places, or content
Editing Across Devices
After transferring photos to your iPad, you can take advantage of the larger screen for editing:
- iPad's larger display makes detailed photo editing easier
- If using iCloud Photos, edits made on one device sync to all devices
- The iPad's Apple Pencil support allows for precise retouching (on compatible iPad models)
Privacy and Security Considerations
When using AirDrop, keep these privacy and security tips in mind:
- Set AirDrop to “Contacts Only” when in public places to prevent strangers from sending you unwanted files
- Be aware that your device name is visible to others when AirDrop is enabled
- Consider turning off AirDrop when not in use to save battery and enhance privacy
- Always verify the sender before accepting transfers from others
Quick Tip to ensure your videos never go missing
Videos are precious memories and all of us never want to lose them to hard disk crashes or missing drives. PicBackMan is the easiest and simplest way to keep your videos safely backed up in one or more online accounts.

Simply download PicBackMan (it's free!) , register your account, connect to your online store and tell PicBackMan where your videos are - PicBackMan does the rest, automatically. It bulk uploads all videos and keeps looking for new ones and uploads those too. You don't have to ever touch it.
Frequently Asked Questions
1. Does AirDrop reduce the quality of my photos when transferring from iPhone to iPad?
No, AirDrop transfers files at their original quality and resolution. Unlike some messaging apps that might compress photos, AirDrop sends the exact file as it exists on your iPhone, preserving all details and metadata.
2. How many photos can I send at once using AirDrop?
There's no technical limit to how many photos you can send via AirDrop in a single transfer. However, for reliability, it's best to send batches of 50-100 photos at a time, especially for older devices. Very large transfers may take longer and have a higher chance of interruption.
3. Why can't my iPad see my iPhone when using AirDrop?
If your iPad can't see your iPhone, check that both devices have Bluetooth and Wi-Fi turned on, AirDrop is enabled, and they're within range (about 30 feet). Also ensure both devices are running compatible iOS versions. Sometimes toggling AirDrop off and on or restarting the devices can resolve detection issues.
4. Can I use AirDrop to send photos from my iPhone to someone else's iPad?
Yes, you can use AirDrop to send photos to any compatible Apple device nearby, not just your own. The process is the same, but the recipient will need to have AirDrop enabled and set to either “Contacts Only” (if you’re in their contacts) or “Everyone.” They'll also need to accept the transfer when prompted.
5. Does AirDrop use cellular data or Wi-Fi to transfer photos?
AirDrop creates its own direct Wi-Fi network between devices using Bluetooth to establish the connection. It doesn't use your cellular data plan or require connection to a Wi-Fi network. This means you can transfer photos even when you're away from Wi-Fi networks without using any data from your plan.
Conclusion
AirDrop is one of the most convenient features in the Apple ecosystem, allowing you to quickly and easily transfer photos from your iPhone to your iPad without cables or internet. With the steps outlined in this guide, you should be able to set up AirDrop, send photos between your devices, and troubleshoot any issues that might arise.
Whether you're transferring a single photo or your entire library, AirDrop maintains the original quality of your images and works seamlessly between your Apple devices. If AirDrop isn't available or working for you, remember that you have several alternatives, including iCloud Photos, Shared Albums, Messages, and email.
By mastering these photo transfer techniques, you can make the most of both your iPhone's excellent camera capabilities and your iPad's larger screen for viewing, editing, and sharing your favorite memories.


