Menu
Start Free $129 Lifetime
Why is it the #1 bulk uploader?
- Insanely fast!
- Maintains folder structure.
- 100% automated upload.
- Supports RAW files.
- Privacy default.
How can you get started?
Download PicBackMan and start free, then upgrade to annual or lifetime plan as per your needs. Join 100,000+ users who trust PicBackMan for keeping their precious memories safe in multiple online accounts.
Trusted by users in 125+ countries.
“Your pictures are scattered. PicBackMan helps you bring order to your digital memories.”
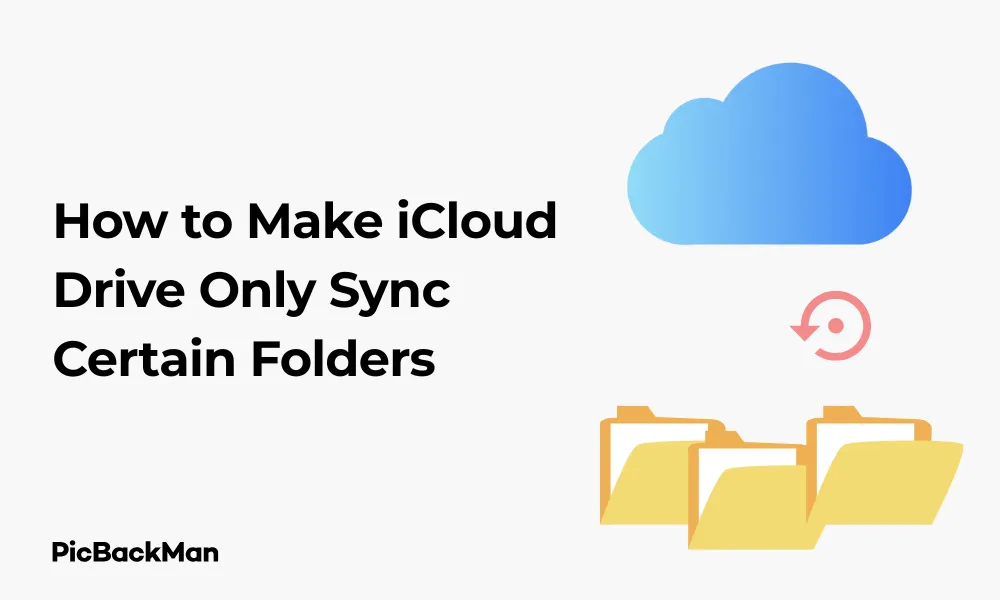
[Easiest] How to Make iCloud Drive Only Sync Certain Folders

Syncing your files to the cloud is a great way to back up your data and access it from multiple devices. But what if you don't want to sync everything? Maybe you have limited storage space or just want to keep certain folders private. Whatever your reason, making iCloud Drive sync only specific folders is actually pretty simple once you know how.
In this guide, I'll walk you through the easiest methods to selectively sync folders with iCloud Drive on Mac, Windows, iPhone, and iPad. No complicated tech skills needed—just straightforward steps anyone can follow.
What You'll Need Before Starting
- An Apple ID with iCloud account
- iCloud Drive enabled on your device
- Enough iCloud storage space for your selected folders
- Updated operating system (macOS, iOS, iPadOS, or Windows)
How to Selectively Sync Folders on Mac
Mac users have the most control over which folders sync to iCloud Drive. Here's how to set it up:
Method 1: Using System Settings (macOS Ventura and Later)
- Click on the Apple menu in the top-left corner of your screen
- Select "System Settings" (or "System Preferences" on older versions)
- Click on your Apple ID at the top of the sidebar
- Select "iCloud"
- Click on "iCloud Drive"
- Click "Options"
- You'll see a list of apps and their associated folders
- Uncheck any apps or folders you don't want to sync
- Click "Done" to save your changes
Method 2: Using Finder for Desktop and Documents Folders
If you specifically want to control whether your Desktop and Documents folders sync:
- Open System Settings/Preferences
- Go to Apple ID > iCloud > iCloud Drive > Options
- Look for "Desktop & Documents Folders"
- Check or uncheck this option depending on whether you want these folders to sync
- Click "Done"
Method 3: Selective Sync with Folder Organization
This method gives you the most control but requires some folder organization:
- Open Finder
- In the sidebar, click on "iCloud Drive"
- Create new folders here for content you want to sync
- Move files you want to sync into these folders
- Keep files you don't want to sync in local folders outside of iCloud Drive
Pro Tip: Creating an Organized Folder Structure
Before you start moving files around, plan your folder structure. For example:
- iCloud Drive/Work (for work documents)
- iCloud Drive/Family (for family photos and documents)
- iCloud Drive/Projects (for current projects)
This way, you'll know exactly what's syncing and can easily manage your cloud storage.
How to Selectively Sync Folders on Windows
Windows users can also control which folders sync with iCloud Drive:
Method 1: Using iCloud for Windows App
- Download and install iCloud for Windows from the Microsoft Store or Apple's website
- Open the iCloud for Windows app
- Sign in with your Apple ID
- Check the box next to "iCloud Drive"
- Click "Options" next to iCloud Drive
- Check or uncheck the folders you want to sync
- Click "Done" and then "Apply"
Method 2: Using File Explorer
Once iCloud Drive is set up on Windows, you can manage files directly:
- Open File Explorer
- Navigate to iCloud Drive in the sidebar
- Create folders for content you want to sync
- Only place files in these folders that you want synced to iCloud
- Keep other files in local folders outside of iCloud Drive
| Windows Version | iCloud App Compatibility | Special Notes |
|---|---|---|
| Windows 10 | Fully compatible | Works best with Microsoft Store version |
| Windows 11 | Fully compatible | Improved integration with File Explorer |
| Windows 8.1 | Limited compatibility | Use older version from Apple's website |
How to Selectively Sync Folders on iPhone and iPad
iOS and iPadOS have fewer options for selective sync, but you can still control which apps use iCloud Drive:
Method 1: Managing App Storage in iCloud
- Open the Settings app
- Tap on your name at the top
- Tap "iCloud"
- Tap "iCloud Drive" or "Apps Using iCloud"
- Toggle off any apps whose data you don't want to sync
Method 2: Using the Files App
For more granular control over individual files:
- Open the Files app
- Tap "Browse" at the bottom
- Under Locations, tap "iCloud Drive"
- Create folders for content you want to sync
- Move files into these folders using the select and move functions
- Keep other files in “On My iPhone/iPad” location instead of iCloud Drive
Managing iCloud Drive Storage on Mobile Devices
To check how much storage each app or folder is using:
- Go to Settings > [Your Name] > iCloud
- Tap "Manage Storage"
- You'll see a breakdown of storage usage by app
- Tap on specific apps to see more details or delete data
Advanced Tips for Selective iCloud Drive Syncing
Using Aliases and Shortcuts
On Mac, you can create aliases to folders that aren't in iCloud Drive:
- Find the folder you want quick access to but don't want to sync
- Right-click and select "Make Alias"
- Move the alias to iCloud Drive
- The alias will sync (it's tiny) but not the actual content
Using Tags for Better Organization
Color-coding can help you quickly identify what's syncing:
- In Finder, right-click a file or folder
- Select a color tag (eg, green for “syncing to iCloud”)
- Use a different color (eg, red) for "local only" files
Optimizing Storage with "Store in iCloud" Option
For Mac users who want to save local storage space:
- Go to Apple menu > System Settings > Apple ID > iCloud
- Click "iCloud Drive" then "Options"
- Check "Optimize Mac Storage"
- This keeps recent files locally but stores older ones only in the cloud
Comparing Different Selective Sync Methods
| Method | Ease of Use | Control Level | Best For |
|---|---|---|---|
| System Settings/Preferences | Easy | Medium | App-by-app control |
| Manual Folder Organization | Medium | High | File-level control |
| Desktop & Documents Toggle | Very Easy | Low | Quick changes to main folders |
| iCloud for Windows Options | Easy | Medium | Windows users |
| iOS/iPadOS App Toggles | Easy | Low | Mobile users |
Quick Tip to ensure your videos never go missing
Videos are precious memories and all of us never want to lose them to hard disk crashes or missing drives. PicBackMan is the easiest and simplest way to keep your videos safely backed up in one or more online accounts.

Simply download PicBackMan (it's free!) , register your account, connect to your online store and tell PicBackMan where your videos are - PicBackMan does the rest, automatically. It bulk uploads all videos and keeps looking for new ones and uploads those too. You don't have to ever touch it.
Troubleshooting Common iCloud Drive Sync Issues
Files Not Syncing
If your selected folders aren't syncing properly:
- Check your internet connection
- Verify you have enough iCloud storage space
- Restart your device
- Sign out of iCloud and sign back in
- Make sure the file types are supported by iCloud
Duplicate Files Appearing
Sometimes you might see duplicate files in iCloud Drive:
- Check if you've moved files between folders while offline
- Wait for sync to complete fully before making more changes
- Delete duplicates only after confirming which is the most recent version
Storage Space Filling Up Too Quickly
If your iCloud storage is filling up despite selective sync:
- Go to Apple ID > iCloud > Manage Storage
- Look for large files or folders you forgot about
- Check if "iCloud Backup" is taking up space (separate from iCloud Drive)
- Delete old backups or large files you don't need
Syncing Large Files and Folders
When syncing large amounts of data:
Preparing large folders for Sync
- Break large collections into smaller folders if possible
- Start with the most important folders first
- Connect to Wi-Fi and keep your device plugged in
- Be patient—initial sync can take time depending on your internet speed
Monitoring Sync Progress
To check if your files are syncing:
- On Mac: Look for the cloud icon next to file names in Finder
- On iOS/iPadOS: Look for download icons in the Files app
- On Windows: Check the iCloud status icon in the system tray
Security Considerations for Selective Sync
When deciding what to sync, consider these security factors:
What to Keep Local vs. Cloud
Some files are better kept local-only:
- Financial documents with sensitive information
- Personal identification documents
- Password lists or security information
- Business-confidential documents (unless using enterprise security)
Encrypting Sensitive Files
If you must sync sensitive files:
- Consider using password-protected ZIP files
- Use third-party encryption tools before uploading
- Enable two-factor authentication on your Apple ID
Optimizing Your iCloud Drive Experience
Regularly Review and Clean Up
Set a reminder periodically:
- Check what's syncing to iCloud Drive
- Remove unnecessary files and folders
- Reorganize folders if your needs have changed
- Verify sync settings are still appropriate
Managing Multiple Devices
If you use iCloud Drive across several devices:
- Use consistent folder naming across devices
- Check sync settings on each device
- Be aware that changes on one device affect all devices
- Consider device-specific folders for content only needed on certain devices
Conclusion
Selectively syncing folders with iCloud Drive doesn't have to be complicated. By following the methods outlined in this guide, you can take control of what syncs to the cloud and what stays local. This helps you maximize your storage space, keep private files secure, and ensure your most important documents are backed up.
Remember that the key to successful selective sync is organization. Take time to plan your folder structure, decide what needs to be synced, and regularly review your setup. With these practices in place, you'll have a streamlined iCloud Drive that works exactly how you want it to.
Whether you're using a Mac, Windows PC, iPhone, or iPad, these techniques will help you make the most of iCloud Drive while keeping only what you need in the cloud.
Frequently Asked Questions
1. Can I change which folders sync to iCloud Drive after I've already set it up?
Yes, you can change your sync settings at any time. On Mac, go to System Settings > Apple ID > iCloud > iCloud Drive > Options. On Windows, open the iCloud for Windows app and modify your settings. On iOS/iPadOS, go to Settings > [Your Name] > iCloud and toggle apps on or off.
2. Will deleting a file from iCloud Drive delete it from my computer too?
Yes, if you delete a file from iCloud Drive, it will be deleted from all devices connected to your iCloud account. If you want to keep a file on your computer but remove it from iCloud, move it to a local folder that isn't synced with iCloud Drive first.
3. How can I tell if a folder is actually syncing to iCloud Drive?
On Mac, folders in iCloud Drive will show a cloud icon if they're in the process of uploading or downloading. Once fully synced, this icon disappears. In Windows, the iCloud for Windows app shows sync status. On iOS/iPadOS, files that are only in the cloud (not downloaded locally) will show a cloud download icon.
4. Is there a size limit for folders I can sync to iCloud Drive?
Individual files in iCloud Drive can be up to 50GB in size. There's no specific folder size limit beyond your total iCloud storage capacity. However, very large folders with thousands of files may take longer to sync initially.
5. Can I use iCloud Drive selective sync with third-party apps?
Yes, but with limitations. Many third-party apps can store data in iCloud Drive if they're designed to work with it. On Mac and iOS, you can control which apps have access to iCloud Drive through your iCloud settings. However, the app itself might not offer folder-level control within its iCloud storage area.


