Menu
Start Free $129 Lifetime
Why is it the #1 bulk uploader?
- Insanely fast!
- Maintains folder structure.
- 100% automated upload.
- Supports RAW files.
- Privacy default.
How can you get started?
Download PicBackMan and start free, then upgrade to annual or lifetime plan as per your needs. Join 100,000+ users who trust PicBackMan for keeping their precious memories safe in multiple online accounts.
Trusted by users in 125+ countries.
“Your pictures are scattered. PicBackMan helps you bring order to your digital memories.”
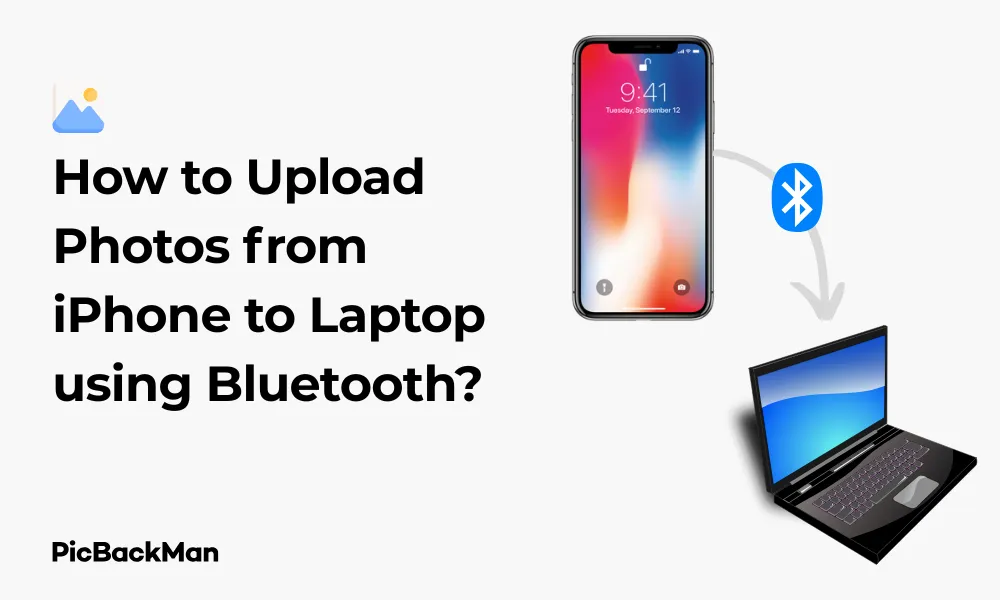
How to Upload Photos from iPhone to Laptop using Bluetooth?

Sharing photos between your iPhone and laptop doesn't have to be complicated. If you're looking for a wireless way to transfer those precious memories without cables or internet, Bluetooth offers a convenient solution. This guide will walk you through the entire process of uploading photos from your iPhone to your laptop using Bluetooth technology.
Why Use Bluetooth for Photo Transfers?
Bluetooth transfers can be handy in several situations:
- When you don't have a USB cable available
- In areas with no WiFi or cellular connection
- When you want to avoid using cloud storage
- For transferring just a few photos quickly
- To save on mobile data usage
While Bluetooth isn't the fastest method for transferring large photo libraries, it's perfect for sending a handful of images without any additional equipment or services.
Prerequisites for Bluetooth Photo Transfer
Before we begin, make sure you have:
- An iPhone with Bluetooth capability (all modern iPhones have this)
- A laptop with Bluetooth functionality
- Both devices charged sufficiently
- The photos you want to transfer are ready on your iPhone
Step-by-Step Guide to Transfer Photos via Bluetooth
Part 1: Preparing Your Devices
Enable Bluetooth on your iPhone
- Open the Settings app on your iPhone
- Tap on Bluetooth
- Toggle the Bluetooth switch to ON (it will turn green)
- Your iPhone is now discoverable to other Bluetooth devices
Enable Bluetooth on Your Windows Laptop
- Click on the Start menu
- Select Settings (gear icon)
- Click on Devices
- Select Bluetooth & other devices
- Toggle Bluetooth to ON
Enable Bluetooth on Your Mac Laptop
- Click on the Apple menu in the top-left corner
- Select System Preferences (or System Settings on newer macOS)
- Click on Bluetooth
- Click Turn Bluetooth On if it's not already enabled
- Check the box that says “Allow Bluetooth devices to find this Mac”
Part 2: Pairing Your iPhone with Your Laptop
Pairing with Windows Laptop
- On your Windows laptop, click "Add Bluetooth or other device"
- Select Bluetooth from the options
- Your laptop will search for available devices
- When your iPhone appears in the list, click on it
- A pairing code will appear on both devices
- Confirm that the codes match and click Pair on both devices
- Wait for the confirmation message that indicates successful pairing
Pairing with Mac Laptop
- In the Bluetooth preferences window on your Mac, your iPhone should appear in the list of devices
- Click on your iPhone's name and then click Connect
- A pairing code will appear on both devices
- Confirm the code matches on both devices
- Click Pair on your iPhone and Connect on your Mac
- Your devices are now paired
Part 3: Transferring Photos from iPhone to Windows Laptop
Unfortunately, direct Bluetooth photo transfer from iPhone to Windows isn't built into iOS. However, there are several workarounds:
Method 1: Use a Third-Party App
- Download and install a file transfer app like “SHAREit” or “Bluetooth File Transfer” on both your iPhone and Windows laptop
- Open the app on both devices
- Follow the app's instructions to connect via Bluetooth
- Select the photos you want to transfer from your iPhone
- Choose your laptop as the destination device
- Confirm the transfer
Method 2: Use AirDrop Alternative Apps
- Install an app like “Snapdrop” or “LocalSend” on both devices
- Open the app on both your iPhone and laptop
- Select the photos from your iPhone's gallery within the app
- Choose your laptop as the recipient
- Accept the incoming files on your laptop
These apps use Bluetooth for device discovery but may switch to Wi-Fi Direct for faster transfers.
Part 4: Transferring Photos from iPhone to Mac Laptop
For Mac users, the process is more straightforward thanks to Apple's ecosystem.
Method 1: Using AirDrop
AirDrop uses both Bluetooth and Wi-Fi for fast transfers:
- Open the Photos app on your iPhone
- Select the photos you want to transfer
- Tap the Share button (square with an arrow)
- Tap AirDrop
- Your Mac should appear in the devices list (if both Bluetooth and Wi-Fi are on)
- Tap on your Mac's icon
- On your Mac, click Accept when prompted
- The photos will be saved to your Downloads folder by default
Method 2: Using Continuity Camera
For newer Macs and iPhones:
- Open a document or application on your Mac where you want to insert a photo
- Right-click and look for an option like “Import from iPhone” or “Take Photo”
- Select your iPhone from the menu
- Your iPhone camera will activate
- Take a new photo or select an existing one from your library
- The photo will automatically appear in your document
Troubleshooting Bluetooth Photo Transfers
If you're experiencing issues with Bluetooth transfers, try these solutions:
Connection Problems
- Restart Bluetooth: Turn Bluetooth off and back on again on both devices
- Check Distance: Make sure your devices are within 30 feet of each other
- Forget and Re-pair: Remove the device from your Bluetooth settings and pair again
- Restart Devices: Sometimes a simple restart fixes connection issues
Transfer Speed Issues
- Reduce File Size: Consider sending lower resolution photos for faster transfers
- Send Fewer Photos: Transfer photos in smaller batches
- Check for Interference: Move away from other electronic devices that may cause interference
- Update Software: Ensure both devices have the latest software updates
Compatibility Issues
- Check Bluetooth Versions: Older Bluetooth versions may have limitations
- Try Alternative Methods: If Bluetooth isn't working well, consider Wi-Fi Direct or cloud storage
- Update Apps: Make sure any third-party transfer apps are up to date
Alternative Methods for Transferring Photos
While Bluetooth is convenient, it's not always the fastest method. Here are some alternatives:
Comparison of Photo Transfer Methods
| Method | Speed | Ease of Use | Requirements | Best For |
|---|---|---|---|---|
| Bluetooth | Slow | Moderate | Bluetooth on both devices | Few photos, no cables available |
| USB Cable | Fast | Easy | Lightning/USB cable | Large photo libraries |
| AirDrop | Very Fast | Very Easy | Apple devices only | Quick transfers between Apple devices |
| Cloud Services | Depends on the internet | Easy | Internet connection, account | Backup and access from multiple devices |
| Slow | Easy | Internet connection | 1-2 photos only |
Using USB Cable
- Connect your iPhone to your laptop using a Lightning to USB cable
- On Windows, the Photos app should open automatically, or you can access your iPhone in File Explorer
- On Mac, the Photos app will open, or you can use Image Capture
- Select and import the photos you want
Using Cloud Services
- Enable iCloud Photos on your iPhone (Settings > [your name] > iCloud > Photos)
- Photos will sync to iCloud automatically
- On your laptop, go to iCloud.com or use the iCloud for Windows app
- Access your photos and download them
Other cloud services like Google Photos, Dropbox, or OneDrive work similarly.
Using Email or Messaging Apps
- Select photos on your iPhone
- Tap the share button
- Choose Email, Messages, or another messaging app
- Send the photos to yourself
- Open the message on your laptop and download the photos
Quick Tip to ensure your videos never go missing
Videos are precious memories and all of us never want to lose them to hard disk crashes or missing drives. PicBackMan is the easiest and simplest way to keep your videos safely backed up in one or more online accounts.

Simply download PicBackMan (it's free!) , register your account, connect to your online store and tell PicBackMan where your videos are - PicBackMan does the rest, automatically. It bulk uploads all videos and keeps looking for new ones and uploads those too. You don't have to ever touch it.
Tips for Managing Photos After Transfer
Once you've transferred your photos, here are some tips for organizing them:
Organizing Photos on Windows
- Use the Photos app to create albums by date, location, or theme
- Rename files with descriptive names
- Create a folder structure that makes sense for your collection
- Use Windows' built-in search to find photos by date or filename
Organizing Photos on Mac
- Use the Photos app to create albums and memories
- Take advantage of facial recognition to sort by people
- Create Smart Albums that automatically collect photos based on criteria
- Use the search function to find photos by content, location, or date
Backup Recommendations
- Keep copies of important photos in multiple locations
- Consider an external hard drive for large collections
- Use at least one cloud service for off-site backup
- Set up automatic backup solutions to protect against data loss
Privacy and Security Considerations
When transferring personal photos, keep these security tips in mind:
- Make your devices visible to others only when necessary
- Accept file transfers only from trusted devices
- Disable Bluetooth when not in use to save battery and increase security
- Be cautious when using public Wi-Fi for cloud transfers
- Consider using encrypted transfer methods for sensitive photos
Frequently Asked Questions
1. Why is my iPhone not showing up in my laptop's Bluetooth devices list?
This could happen for several reasons. First, make sure Bluetooth is enabled on both devices and your iPhone is set to be discoverable. Try restarting Bluetooth on both devices. If that doesn't work, restart both your iPhone and laptop completely. Also, check if your devices are compatible - very old laptops might have outdated Bluetooth versions that don't work well with newer iPhones.
2. How long does it take to transfer photos via Bluetooth?
Bluetooth transfers are relatively slow compared to other methods. A single photo might take 10-30 seconds depending on its size and the Bluetooth version your devices use. For multiple photos, expect longer times - a dozen high-resolution photos could take several minutes. This is why Bluetooth is better suited for transferring just a few photos rather than your entire library.
3. Can I transfer videos from my iPhone to my laptop using Bluetooth?
Yes, you can transfer videos using the same methods described for photos. However, videos are typically much larger files than photos, so the transfer will take significantly longer. For videos longer than a minute or two, you might find that other transfer methods like USB cables or cloud services are more practical due to Bluetooth's limited transfer speed.
4. Why does my Bluetooth connection keep dropping during photo transfers?
Bluetooth connections can drop for several reasons: distance between devices (try keeping them within 10 feet of each other), interference from other electronic devices, obstacles like walls or metal objects, or battery-saving settings that might turn off Bluetooth. Try moving your devices closer together in an area with minimal electronic interference, and make sure both devices have sufficient battery power.
5. Is there a limit to how many photos I can transfer at once via Bluetooth?
There's no hard technical limit to the number of photos you can queue for transfer, but there are practical limitations. Bluetooth transfers are slow, and attempting to send too many photos at once might lead to connection timeouts or app crashes. It's generally better to transfer photos in smaller batches of 5-10 at a time, especially if they're high-resolution images. This approach is more reliable and allows you to track progress more easily.
Conclusion
Transferring photos from your iPhone to your laptop via Bluetooth provides a wireless solution that doesn't require internet connectivity. While it may not be the fastest method, it's convenient when you don't have cables or Wi-Fi available. For Mac users, AirDrop offers a more seamless experience, while Windows users might need third-party apps to bridge the gap.
Remember that Bluetooth works best for transferring small batches of photos. For larger collections, consider using a USB cable, cloud services, or other faster methods. With the steps outlined in this guide, you should be able to successfully move your precious memories from your iPhone to your laptop without much hassle.
By understanding the various methods available, you can choose the one that best fits your specific situation and technical setup. Whether you're a casual photographer or someone with thousands of photos, there's a solution that will work for your needs.


