Menu
Start Free $129 Lifetime
Why is it the #1 bulk uploader?
- Insanely fast!
- Maintains folder structure.
- 100% automated upload.
- Supports RAW files.
- Privacy default.
How can you get started?
Download PicBackMan and start free, then upgrade to annual or lifetime plan as per your needs. Join 100,000+ users who trust PicBackMan for keeping their precious memories safe in multiple online accounts.
Trusted by users in 125+ countries.
“Your pictures are scattered. PicBackMan helps you bring order to your digital memories.”
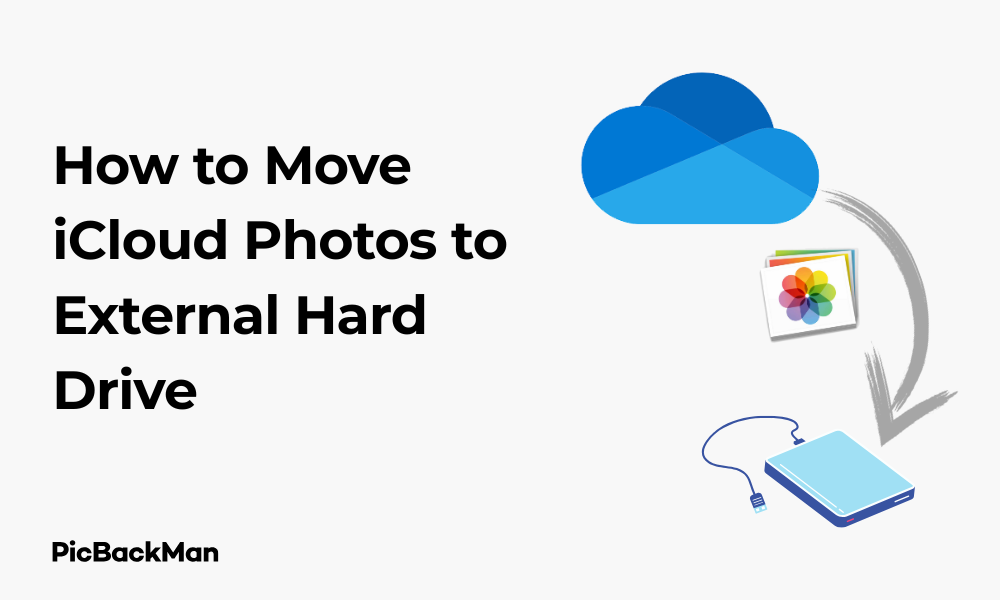
Most Efficient - How to Move iCloud Photos to External Hard Drive

Want to free up your iCloud storage without losing precious memories? Moving your iCloud photos to an external hard drive is a smart solution that gives you physical backup control while clearing online space. I've put together this comprehensive guide to help you transfer those cherished images safely and efficiently.
Whether you're running out of iCloud storage, need offline access to your photo library, or simply want an extra backup, this step-by-step guide covers everything you need. Let's explore the most reliable methods to download and transfer your iCloud photos to an external drive.
Why Move iCloud Photos to an External Hard Drive?
Before diving into the how-to steps, let's quickly look at why you might want to move your iCloud photos to an external hard drive:
- Free up valuable iCloud storage space
- Create a physical backup that doesn't require internet access
- Avoid monthly subscription fees for extra iCloud storage
- Gain more control over your photo organization
- Protect your memories from potential cloud service issues
What You'll Need Before Starting
To successfully transfer your iCloud photos to an external hard drive, make sure you have:
- An external hard drive with enough storage space
- A computer (Mac or Windows) with internet connection
- Your Apple ID and password
- Enough free space on your computer for temporary downloads
- Time and patience (depending on your library size)
Method 1: Using the Photos App on Mac
If you're a Mac user, the Photos app offers the most straightforward approach to download and transfer your iCloud photos.
Step 1: Prepare Your Mac and External Hard Drive
- Connect your external hard drive to your Mac
- Create a new folder on the external drive specifically for your photos
- Make sure your Mac has enough temporary storage space for the download process
Step 2: Download All Photos from iCloud to Your Mac
- Open the Photos app on your Mac
- Sign in with your Apple ID if prompted
- Go to Photos > Preferences from the menu bar
- Click on the "iCloud" tab
- Check "Download Originals to this Mac"
Wait for all photos to download completely. This may take several hours depending on your internet speed and the size of your photo library. You'll know the process is complete when you no longer see the download icon (cloud with down arrow) on any photos.
Step 3: Export Photos to Your External Hard Drive
- In the Photos app, press Command+A to select all photos (or select specific albums)
- Go to File > Export > Export Unmodified Original
- Choose your external hard drive folder as the destination
- Click "Export"
The export process will begin, and you'll see a progress bar. For large libraries, this might take a while, so be patient.
Step 4: Verify Your Transfer
- Once the export completes, open your external hard drive
- Check that all photos transferred correctly
- Verify random files open properly
- Confirm the number of files matches your iCloud library
Method 2: Using iCloud.com (Works for Mac and Windows)
Don't have a Mac? No problem! You can access and download your photos through iCloud.com on any computer.
Step 1: Sign in to iCloud.com
- Open your web browser and go to iCloud.com
- Sign in with your Apple ID and password
- Click on "Photos" from the main iCloud dashboard
Step 2: Select and Download Photos
- Use the sidebar to navigate through your library (All Photos, Years, Albums, etc.)
- Select the photos you want to download (hold Ctrl/Command while clicking for multiple selections)
- For large selections, click on a photo, hold Shift, then click the last photo to select everything in between
- Click the download icon (cloud with down arrow) in the top menu
Note: iCloud.com limits downloads to 1,000 photos at a time, so you may need to repeat this process in batches for large libraries.
Step 3: Transfer Downloaded Photos to External Hard Drive
- Connect your external hard drive to your computer
- Create a folder on your external drive for the photos
- Locate the downloaded photos on your computer (usually in the Downloads folder)
- Select all downloaded photos and drag them to your external hard drive folder
Step 4: Organize Your Photos (Optional)
- Create subfolders on your external drive to organize photos by year, event, or category
- Sort photos into these folders for better organization
- Rename files if needed for easier searching
Method 3: Using iCloud for Windows
Windows users can take advantage of Apple's official iCloud for Windows application to download and transfer photos.
Step 1: Install iCloud for Windows
- Download iCloud for Windows from the Microsoft Store or Apple's website
- Install the application and restart your computer if prompted
- Open iCloud for Windows and sign in with your Apple ID
Step 2: Configure Photo Download Settings
- In the iCloud for Windows app, check the box next to "Photos"
- Click "Options" next to Photos
- Select "Download new photos and videos to my PC"
- Choose "Download originals" to get full-resolution files
- Click "Done" and then "Apply"
Step 3: Wait for Photos to Download
iCloud for Windows will create an iCloud Photos folder on your PC and begin downloading your photos. This process may take several hours depending on your library size and internet speed.
Step 4: Transfer Photos to External Hard Drive
- Connect your external hard drive to your computer
- Navigate to the iCloud Photos folder on your PC (usually in Pictures)
- Select all photos or specific folders you want to transfer
- Copy and paste them to your external hard drive
- Wait for the transfer to complete
Method 4: Using Third-Party Tools
If you have a very large library or want more control over the transfer process, third-party tools can help streamline the process.
Option 1: Using Image Capture (Mac Only)
Image Capture is a built-in Mac utility that can help with photo transfers:
- Connect your external hard drive to your Mac
- Open Image Capture from Applications
- Connect your iPhone (if you want to transfer directly from your device)
- Select the photos you want to transfer
- Choose your external hard drive as the destination
- Click "Import" or "Import All"
Option 2: Using Photo Transfer Apps
Several third-party applications can help manage the transfer process. Some popular options include:
| App Name | Platform | Key Features |
|---|---|---|
| PhotoSync | iOS, Android, Windows, Mac | Wireless transfers, automatic backups, custom filters |
| iMazing | Windows, Mac | Full iOS device management, selective transfers, no iCloud required |
| CopyTrans | Windows | Batch transfers, maintains folder structure, metadata preservation |
Method 5: Direct Transfer from iPhone to External Drive
If you have a newer iPhone and a compatible external drive, you might be able to transfer photos directly:
For iPhones with Lightning Port
- Get a Lightning to USB adapter
- Connect your external drive to the adapter
- Connect the adapter to your iPhone
- Open the Files app on your iPhone
- Navigate to your external drive
- Create a new folder for your photos
- Open the Photos app, select photos, tap Share, then Save to Files
- Choose your external drive folder as the destination
For iPhones with USB-C Port (iPhone 15 and newer)
- Connect your USB-C external drive directly to your iPhone
- Open the Files app on your iPhone
- Navigate to your external drive
- Create a new folder for your photos
- Open the Photos app, select photos, tap Share, then Save to Files
- Choose your external drive folder as the destination
Quick Tip to ensure your videos never go missing
Videos are precious memories and all of us never want to lose them to hard disk crashes or missing drives. PicBackMan is the easiest and simplest way to keep your videos safely backed up in one or more online accounts.

Simply download PicBackMan (it's free!), register your account, connect to your online store and tell PicBackMan where your videos are - PicBackMan does the rest, automatically. It bulk uploads all videos and keeps looking for new ones and uploads those too. You don't have to ever touch it.
Comparing All Methods: Which One Should You Choose?
| Method | Best For | Pros | Cons |
|---|---|---|---|
| Photos App (Mac) | Mac users with large libraries | Preserves metadata, simple interface, handles large transfers | Mac only, requires temporary space on computer |
| iCloud.com | Any computer, small to medium libraries | Works on any computer, no software needed | 1,000 photo limit per download, slower for large libraries |
| iCloud for Windows | Windows users | Official Apple solution, maintains folder structure | Sometimes buggy, can be slow with large libraries |
| Third-Party Tools | Advanced users, special requirements | More features, better control, faster transfers | May cost money, learning curve |
| Direct iPhone Transfer | Quick transfers without a computer | No computer needed, portable solution | Limited by iPhone storage, slower, requires adapters |
Tips for a Successful Transfer
Preparing Your External Hard Drive
Before starting any transfer method, make sure your external drive is properly set up:
- Format your drive in a compatible file system:
- For Mac only: APFS or Mac OS Extended (HFS+)
- For both Mac and Windows: exFAT
- For Windows only: NTFS
- Create a clear folder structure to organize your photos
- Make sure the drive has enough free space (check your iCloud storage usage for reference)
- Test the drive works properly before starting large transfers
Managing Large Photo Libraries
If you have thousands of photos, try these strategies:
- Break down the transfer into smaller batches (by year or album)
- Start with your most important photos first
- Use a wired connection for faster transfers
- Keep your computer plugged in during long transfers
- Disable sleep mode to prevent interruptions
Preserving Photo Metadata
To keep important information like dates, locations, and camera settings:
- Always choose "Export Unmodified Originals" in Photos app
- Avoid screenshot methods that might lose metadata
- Check that date/time information transfers correctly
- Verify location data is preserved if important to you
What to Do After Transferring Your Photos
Verifying Your Backup
After transferring your photos, take these steps to ensure everything worked properly:
- Compare the number of files on your external drive with your iCloud library count
- Open random photos from different time periods to check quality and metadata
- Check that videos play correctly
- Verify Live Photos retained their special features (if applicable)
- Make sure photo albums or organization transferred as expected
Creating Multiple Backups
For maximum security, consider these additional backup strategies:
- Create a second backup on another external drive
- Store one backup in a different physical location
- Consider a cloud backup service as a secondary option
- Set a reminder to update your backup regularly
Managing Your iCloud Storage
After backing up to an external drive, you might want to free up iCloud space:
- Decide whether to keep all, some, or no photos in iCloud
- If removing photos from iCloud:
- On iPhone/iPad: Settings > [your name] > iCloud > Photos > turn off "iCloud Photos"
- On Mac: Photos app > Preferences > iCloud > uncheck "iCloud Photos"
- Delete photos from iCloud.com if needed
- Consider downgrading your iCloud storage plan if you no longer need as much space
Troubleshooting Common Issues
Photos Not Downloading Properly
If you're having trouble getting photos from iCloud:
- Check your internet connection
- Sign out of iCloud and sign back in
- Restart your computer
- Make sure you have enough storage space on your computer
- Try downloading in smaller batches
Transfer Errors to External Drive
If you encounter problems moving photos to your external drive:
- Check if your drive is properly connected
- Verify the drive isn't full
- Try a different USB port or cable
- Check for drive formatting issues
- Run disk repair utilities if needed
Missing Photos or Albums
If some photos didn't transfer:
- Check if they're still downloading from iCloud
- Look for them in the "Recently Deleted" album
- Make sure you selected all photos before exporting
- Try a different transfer method
- Check if they're in a shared album that requires separate downloading
Maintaining Your Photo Library Long-Term
Once you've successfully moved your photos, keep them organized and safe:
- Establish a regular backup schedule
- Consider using photo management software for your external drive
- Check your external drive periodically for errors
- Store your drive in a cool, dry place
- Consider upgrading your storage solution every few years as technology improves
Conclusion
Moving your iCloud photos to an external hard drive gives you more control over your precious memories while potentially saving you money on cloud storage fees. The process might take some time, especially if you have thousands of photos, but the peace of mind is worth it.
Whether you choose to use the Photos app on Mac, iCloud.com, iCloud for Windows, or a third-party tool, the key is to be patient and verify your transfer carefully. Remember to create a good folder structure on your external drive and consider keeping multiple backups for extra security.
By following the steps in this guide, you'll have successfully created a physical backup of your photo library that you can access anytime, even without an internet connection. This approach gives you the best of both worlds – the convenience of iCloud when you need it and the security of a physical backup you control.
Frequently Asked Questions
Will moving photos to an external drive delete them from my iPhone?
No, simply copying photos to an external drive doesn't remove them from your iPhone or iCloud. If you want to free up space after backing up, you'll need to manually delete photos or turn off iCloud Photos.
How often should I update my external drive backup?
For active photographers, updating your backup monthly is a good practice. If you take fewer photos, quarterly backups might be sufficient. Create a calendar reminder to help you remember.
What type of external drive is best for photo storage?
SSDs (Solid State Drives) are ideal for photo storage because they're faster, more durable, and less prone to mechanical failure than traditional hard drives. However, they cost more per gigabyte, so for very large libraries, a traditional HDD might be more cost-effective.
Can I access photos on my external drive from my iPhone?
Yes, with newer iPhones that support external storage connections (via Lightning adapter or USB-C), you can browse photos stored on your external drive using the Files app. However, they won't integrate with your Photos app unless you import them.
If I delete photos from iCloud after backing up, will I lose any special features?
Some iCloud-specific features like Shared Albums and iCloud photo sharing will no longer work with photos only stored on your external drive. Also, you'll lose the ability to access those specific photos across all your Apple devices automatically.


