Menu
Start Free $129 Lifetime
Why is it the #1 bulk uploader?
- Insanely fast!
- Maintains folder structure.
- 100% automated upload.
- Supports RAW files.
- Privacy default.
How can you get started?
Download PicBackMan and start free, then upgrade to annual or lifetime plan as per your needs. Join 100,000+ users who trust PicBackMan for keeping their precious memories safe in multiple online accounts.
Trusted by users in 125+ countries.
“Your pictures are scattered. PicBackMan helps you bring order to your digital memories.”
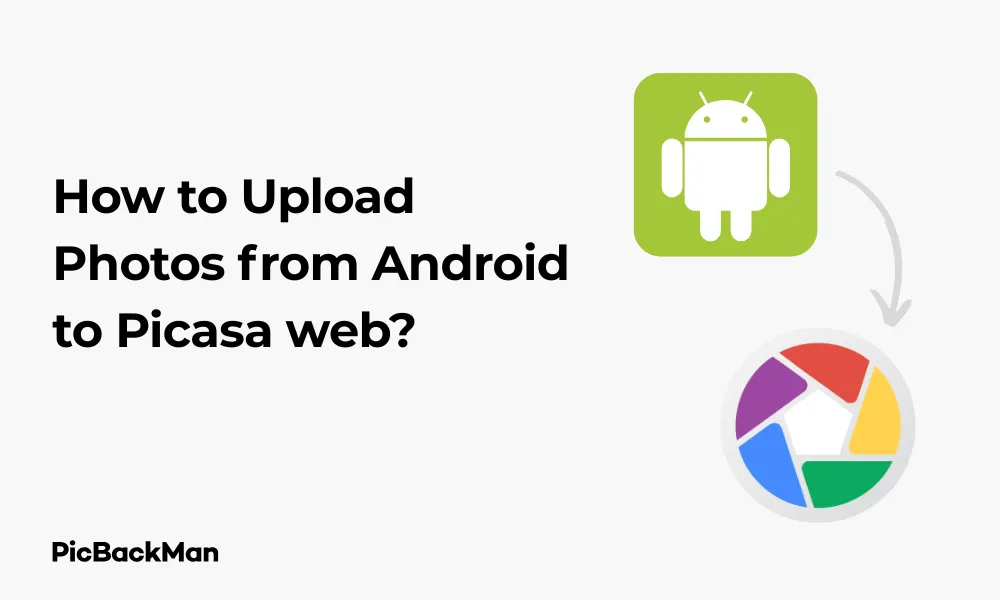
How to Upload Photos from Android to Picasa web?

Sharing photos from your Android device to Picasa Web (now part of Google Photos) is a great way to back up precious memories and share them with friends and family. This guide will walk you through the entire process of uploading your Android photos to Picasa Web, offering multiple methods and troubleshooting tips along the way.
What is Picasa Web?
Before we dive into the upload methods, let's clarify what Picasa Web is. Picasa Web Albums was Google's photo sharing service that allowed users to store and share digital photos online. In 2016, Google began phasing out Picasa and integrated its features into Google Photos. While the Picasa desktop application has been discontinued, Picasa Web Albums content has been moved to Google Photos.
This means that when you're uploading to "Picasa Web" today, you're actually using Google Photos infrastructure, even though some apps and services still reference the Picasa name in their API connections.
Preparing Your Android Device for Photo Uploads
Before uploading your photos, make sure your Android device meets these basic requirements:
- Updated Android operating system (preferably Android 5.0 or higher)
- Stable internet connection (Wi-Fi recommended for large uploads)
- Sufficient battery life (or connect to a power source)
- Google account set up on your device
- Enough storage space in your Google account
Method 1: Using Google Photos App (Recommended)
The easiest and most direct way to upload photos from your Android to what was formerly Picasa Web is through the Google Photos app, which comes pre-installed on most Android devices.
Step-by-Step Instructions:
- Open the Google Photos app on your Android device
- Sign in with your Google account if prompted
- Tap on your profile picture in the top right corner
- Select "Photos settings" from the menu
- Tap on "Back up & sync"
- Toggle the "Back up & sync" option to ON
Important Settings to Consider:
When setting up backup in Google Photos, you can choose the upload quality. "Storage saver" (formerly "High quality") provides unlimited free storage but compresses photos slightly. "Original quality" maintains full resolution but counts against your Google storage quota. Choose based on your storage needs and photo quality preferences.
Once you've enabled backup, your photos will automatically upload to Google Photos (the service that replaced Picasa Web) whenever your device is connected to Wi-Fi and charging, by default. You can change these settings if needed.
Manual Upload of Specific Photos
If you want to upload specific photos rather than enabling automatic backup:
- Open Google Photos app
- Select the photos you want to upload by long-pressing one photo and then tapping additional ones
- Tap the "+" icon at the top of the screen
- Select "Album" to create a new album or add to an existing one
- Name your album and tap "Create"
Method 2: Using the Old Picasa Web Albums URL
Although Google has migrated Picasa Web Albums to Google Photos, you can still access some Picasa Web features through a web browser.
Steps to Upload via Browser:
- Open your web browser on your Android device
- Go to photos.google.com
- Sign in with your Google account
- Tap the "+" icon at the top of the page
- Select "Upload" from the dropdown menu
- Choose "Photos and videos from your device"
- Select the photos you want to upload
- Tap "Open" or "Done" to begin the upload
Method 3: Using Third-Party Apps with Picasa Web Integration
Several third-party apps still offer Picasa Web Albums integration through Google's API. These can be useful if you prefer a different interface or specific features not available in Google Photos.
Popular Third-Party Apps:
| App Name | Key Features | Ease of Use |
|---|---|---|
| A+ Gallery | Cloud sync, photo editing, face grouping | Easy |
| QuickPic | Fast loading, cloud sync, hidden folders | Medium |
| F-Stop Gallery | Tagging, sorting, GIF support | Medium |
| PhotoSync | Cross-platform sync, automatic backup | Medium |
Using A+ Gallery for Picasa Web Uploads:
- Download and install A+ Gallery from the Google Play Store
- Open the app and tap on the menu icon (three lines)
- Select "Cloud Services"
- Tap on "Google Photos" (which connects to the former Picasa Web service)
- Sign in with your Google account
- Navigate to your device photos within the app
- Select the photos you want to upload
- Tap the upload icon and choose your destination album
Method 4: Using File Transfer Apps
If you prefer more control over your file transfers, dedicated file transfer apps can help upload photos to your Google account.
Steps Using Send Anywhere:
- Install Send Anywhere from the Google Play Store
- Open the app and select the photos you want to upload
- Tap "Send"
- Choose "Save to Cloud" option
- Select "Google Drive" (you can later move these to Google Photos)
- Sign in to your Google account if prompted
- Select a destination folder and tap "Upload"
Method 5: Direct Upload via USB to Computer Then to Picasa Web
For those who prefer using a computer as an intermediary, especially for large batches of photos:
Step-by-Step Process:
- Connect your Android device to your computer using a USB cable
- On your Android device, pull down the notification shade and select "USB file transfer" or "File transfer" mode
- On your computer, open the file explorer and navigate to your phone's DCIM or Pictures folder
- Copy the photos you want to upload to a folder on your computer
- Open a web browser on your computer and go to photos.google.com
- Click the "Upload" button at the top right
- Select the photos from your computer that you want to upload
- Click "Open" to begin the upload process
Important Note for Bulk Uploads:
When uploading large numbers of photos (100+), it's best to use a computer with a stable internet connection. The Google Photos website allows you to create albums during upload, which helps organize your photos immediately. You can also drag and drop photos directly into the browser window on most modern browsers for a faster workflow.
Managing Your Photos After Upload
Once your photos are uploaded to Google Photos (formerly Picasa Web), you have several options for organizing and sharing them:
Creating Albums
- Open Google Photos app or website
- Tap "Library" at the bottom of the screen
- Select "Albums"
- Tap the "New album" button
- Name your album
- Select photos to add to the album
- Tap "Done" or "Create"
Sharing Photos and Albums
- Open the photo or album you want to share
- Tap the "Share" icon
- Choose how you want to share:
- Create a sharing link
- Share directly to social media
- Share with specific Google contacts
- Add to a shared album
- Adjust sharing permissions as needed
Comparing Automatic vs. Manual Upload Methods
| Feature | Automatic Backup | Manual Upload |
|---|---|---|
| Ease of use | Very easy - set once and forget | Requires action for each upload session |
| Control over what's uploaded | Limited - uploads all photos by default | High - select exactly what to upload |
| Battery usage | Can drain battery if not set to "while charging only" | Only uses battery during manual uploads |
| Data usage | Can be high if not limited to Wi-Fi only | Only uses data when you choose to upload |
| Best for | Complete backup, peace of mind | Selective sharing, limited storage plans |
Troubleshooting Common Upload Issues
Photos Not Uploading
If your photos aren't uploading to Google Photos (Picasa Web replacement), try these solutions:
- Check your internet connection - switch to a stronger Wi-Fi signal
- Verify backup settings are enabled in Google Photos app
- Ensure you haven't exceeded your Google account storage limit
- Restart the Google Photos app
- Clear the app cache (Settings > Apps > Google Photos > Storage > Clear Cache)
- Update the Google Photos app to the latest version
- Check if battery optimization is limiting the app (disable it for Google Photos)
Slow Upload Speeds
To improve slow upload speeds:
- Connect to a stronger Wi-Fi network
- Upload fewer photos at once
- Reduce the size/resolution of photos before uploading
- Close other apps running in the background
- Try uploading during off-peak hours
Missing Photos After Upload
If photos appear to be missing after upload:
- Check the "Recently added" section in Google Photos
- Use the search function to find photos by location, date, or content
- Verify you're signed into the correct Google account
- Look in the "Archive" section (some photos may be automatically archived)
- Check if the photos are still on your device and try re-uploading
Tips for Efficient Photo Management
Before Uploading
- Delete unwanted or duplicate photos to save storage space
- Organize photos into folders on your device for easier selection
- Consider editing photos before uploading to save time later
- Rename important photos with descriptive filenames for easier searching
After Uploading
- Create themed albums for better organization
- Use Google Photos' search features to find specific photos
- Add descriptions to important photos
- Tag people to make finding photos of specific individuals easier
- Regularly review and delete unwanted photos to free up storage
Understanding Storage Limitations
Google Photos (which replaced Picasa Web) has important storage considerations:
- As of June 1, 2021, all new photos and videos count toward your 15 GB of free Google account storage
- Photos uploaded before this date in "High quality" (now "Storage saver") don't count against your storage
- Original quality photos always count against your storage quota
- Storage is shared across Gmail, Google Drive, and Google Photos
Storage Plans
If you need more storage, Google One offers expanded storage plans:
- 15 GB - Free with every Google account
- 100 GB - Basic paid plan
- 200 GB - Mid-tier plan
- 2 TB - Premium plan
- Higher tiers available for professional needs
Privacy and Sharing Settings
Managing privacy for your uploaded photos is important:
Default Privacy
By default, photos uploaded to Google Photos are private and only visible to you. You must explicitly choose to share them.
Sharing Options
- Direct sharing with specific people via email
- Creating shareable links that anyone can access
- Partner sharing with a trusted contact
- Creating shared albums that multiple people can contribute to
- Shared libraries for automatic sharing with family members
Location Data
Be aware that photos taken on your Android device may contain location data. Google Photos can use this for organizing, but you may want to remove it for privacy when sharing:
- Before sharing, tap the three dots on the photo
- Select "Remove location"
- Then proceed with sharing
Quick Tip to ensure your videos never go missing
Videos are precious memories and all of us never want to lose them to hard disk crashes or missing drives. PicBackMan is the easiest and simplest way to keep your videos safely backed up in one or more online accounts.

Simply download PicBackMan (it's free!), register your account, connect to your online store and tell PicBackMan where your videos are - PicBackMan does the rest, automatically. It bulk uploads all videos and keeps looking for new ones and uploads those too. You don't have to ever touch it.
Frequently Asked Questions
Can I still use the Picasa desktop application to upload to Picasa Web?
No, Google discontinued support for the Picasa desktop application in March 2016. While some users may still have the software installed, it no longer receives updates and has limited functionality with current Google services. It's recommended to use Google Photos instead.
Will my photos upload automatically in the background?
Yes, if you enable the "Back up & sync" feature in Google Photos, your photos will upload automatically in the background according to your settings. You can configure it to upload only when connected to Wi-Fi and/or only when your device is charging to save data and battery life.
What happens if I delete a photo from my phone after uploading it?
Once a photo is successfully uploaded to Google Photos, deleting it from your phone will not delete it from Google Photos. However, if you use the "Free up space" feature in the Google Photos app, it will remove photos from your device that have already been backed up.
Can I upload videos to Picasa Web/Google Photos from my Android?
Yes, Google Photos allows you to upload videos as well as photos. The process is the same for both. However, videos may take longer to upload due to their larger file size, and video quality may be reduced depending on your upload quality settings.
How can I tell if my photos have finished uploading?
In the Google Photos app, you can check the upload status by looking for a circular upload icon in the top right corner. You can tap on this icon to see more details about the upload progress. Once the icon disappears, all photos have been uploaded. You can also go to photos.google.com on a computer and check if your recent photos appear there.
Conclusion
Uploading photos from your Android device to Picasa Web (now Google Photos) is a straightforward process with multiple methods to suit your needs. Whether you prefer the simplicity of automatic backups or the control of manual uploads, Google Photos offers a reliable way to store, organize, and share your precious memories.
Remember that while Picasa Web Albums has been integrated into Google Photos, the core functionality remains the same – your photos are safely stored in the cloud, accessible from any device, and easily shareable with friends and family. By following the steps outlined in this guide, you'll be able to keep your photo collection organized and protected.
With regular uploads from your Android device, you'll never have to worry about losing important photos due to a lost, stolen, or damaged phone. Start uploading today to preserve your memories for years to come.


