Menu
Start Free $129 Lifetime
Why is it the #1 bulk uploader?
- Insanely fast!
- Maintains folder structure.
- 100% automated upload.
- Supports RAW files.
- Privacy default.
How can you get started?
Download PicBackMan and start free, then upgrade to annual or lifetime plan as per your needs. Join 100,000+ users who trust PicBackMan for keeping their precious memories safe in multiple online accounts.
Trusted by users in 125+ countries.
“Your pictures are scattered. PicBackMan helps you bring order to your digital memories.”
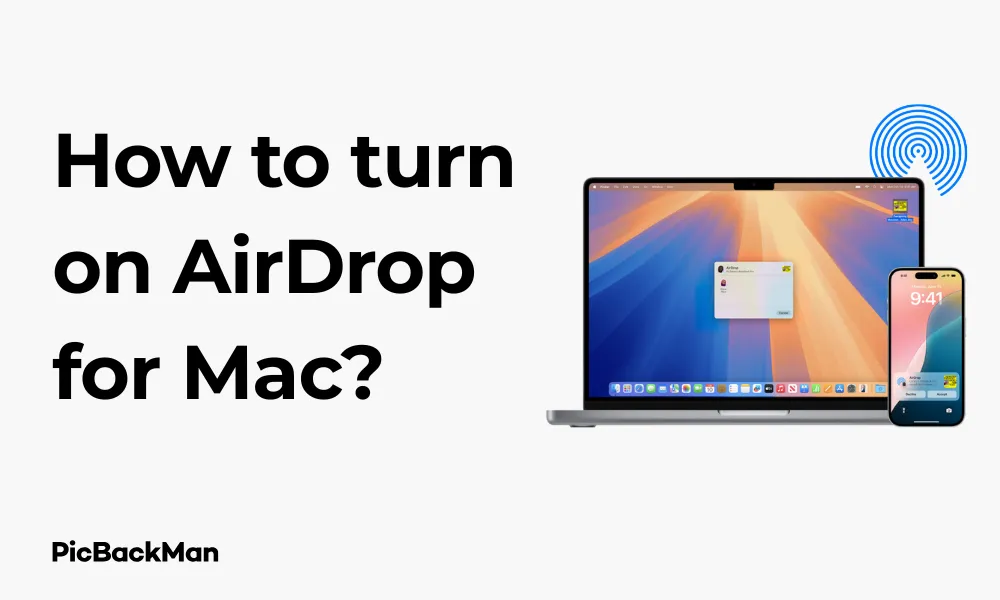
How to turn on AirDrop for Mac?

Sharing files between Apple devices should be simple, and that's exactly what AirDrop delivers. This handy feature lets you wirelessly send photos, documents, and more between Macs, iPhones, and iPads with just a few clicks. If you've never used AirDrop on your Mac or need a refresher, you're in the right place. This guide will walk you through everything you need to know about turning on and using AirDrop on your Mac.
What is AirDrop?
AirDrop is Apple's proprietary wireless file-sharing technology that uses a combination of Bluetooth and Wi-Fi to create a direct connection between devices. It allows for quick transfers without needing email, messaging apps, or cloud storage services as intermediaries.
The beauty of AirDrop lies in its simplicity and speed. You can share files of almost any size without compression, and the transfers happen quickly, even for large files.
Requirements for Using AirDrop on Mac
Before we jump into the steps, let's make sure your Mac supports AirDrop:
- For Mac-to-Mac sharing: Your Mac needs to be from 2008 or later (except the 2008 MacBook) and running at least OS X Yosemite
- For sharing between Mac and iOS devices: Your Mac needs to be from 2012 or later and running at least OS X Yosemite
- Both Bluetooth and Wi-Fi must be turned on (you don't need to be connected to a Wi-Fi network)
- The devices need to be within 30 feet (9 meters) of each other
Step-by-Step Guide to Turn on AirDrop on Mac
Let's go through the different ways you can enable AirDrop on your Mac:
Method 1: Turn on AirDrop from Finder
- Open a Finder window by clicking on the Finder icon in your Dock (the smiling face icon)
- In the sidebar on the left, look for AirDrop under the "Favorites" section and click on it
- If Bluetooth or Wi-Fi is off, you'll see a message asking you to turn them on. Click the "Turn On Bluetooth" or "Turn On Wi-Fi" button as needed
- Once AirDrop opens, it automatically turns on and starts looking for nearby devices
Important Note:
If you don't see AirDrop in your Finder sidebar, you can add it by going to Finder > Preferences > Sidebar and checking the AirDrop box under "Favorites."
Method 2: Turn on AirDrop from Control Center (macOS Big Sur and later)
- Click the Control Center icon in the menu bar (it looks like two toggle switches)
- Click on AirDrop
- Make sure Bluetooth and Wi-Fi are turned on
- Choose who can discover your Mac: "No One," "Contacts Only," or "Everyone"
Method 3: Use the AirDrop Menu in Share Sheets
- Select the file you want to share
- Click the Share button (the square with an arrow pointing up) or right-click and select "Share"
- Choose AirDrop from the sharing options
- This will automatically enable AirDrop and show you available devices
Configuring AirDrop Discovery Settings
Once AirDrop is turned on, you can control who can see your Mac and send you files:
From the Finder AirDrop Window:
- Open AirDrop in Finder as described above
- At the bottom of the window, click where it says "Allow me to be discovered by:"
- Choose one of these options:
- No One: Your Mac won't be visible to any AirDrop users
- Contacts Only: Only people in your Contacts app can see your Mac
- Everyone: Any nearby Apple device can see your Mac
From Control Center (macOS Big Sur and later):
- Click the Control Center icon in the menu bar
- Click on AirDrop
- Select your preferred discovery setting from the dropdown menu
| Discovery Setting | Who Can See Your Mac | Best For |
|---|---|---|
| No One | Nobody | When you want complete privacy |
| Contacts Only | People in your Contacts app | Normal everyday use with friends and colleagues |
| Everyone | Any nearby Apple device | When sharing with new people or in public settings |
How to Use AirDrop to Send Files from Your Mac
Now that you have AirDrop turned on, here's how to send files:
Method 1: Using Finder
- Open a Finder window and navigate to the file you want to share
- Select the file
- Click the Share button in the Finder toolbar (or right-click and select "Share")
- Choose AirDrop from the sharing options
- A window will appear showing nearby AirDrop-enabled devices
- Click on the device you want to send the file to
- The recipient will get a notification asking them to accept the file
- Once accepted, the file transfer begins
Method 2: Drag and Drop to AirDrop Window
- Open a Finder window and click on AirDrop in the sidebar
- In another Finder window, locate the file you want to share
- Drag the file from its location and drop it onto the recipient's icon in the AirDrop window
- The recipient will get a notification to accept the file
Pro Tip:
You can select multiple files to share at once by holding down the Command key while clicking on files before dragging them to the AirDrop window or using the Share menu.
Quick Tip to ensure your videos never go missing
Videos are precious memories and all of us never want to lose them to hard disk crashes or missing drives. PicBackMan is the easiest and simplest way to keep your videos safely backed up in one or more online accounts.

Simply download PicBackMan (it's free!), register your account, connect to your online store and tell PicBackMan where your videos are - PicBackMan does the rest, automatically. It bulk uploads all videos and keeps looking for new ones and uploads those too. You don't have to ever touch it.
Receiving Files via AirDrop on Your Mac
When someone sends you a file via AirDrop:
- You'll see a notification with a preview of the file
- You'll have two options: "Accept" or "Decline"
- If you click "Accept," the file will be saved to your Downloads folder by default
- A Finder window will open showing you the received file
Changing Where AirDrop Files Are Saved
By default, AirDrop saves received files to your Downloads folder. If you want to change this location:
- Open Terminal (from Applications > Utilities)
- Type the following command, replacing "~/Desktop" with your desired folder path:
defaults write com.apple.finder AirDropDownloadPath -string "~/Desktop" - Press Enter
- Restart Finder by typing:
killall Finder - Press Enter again
Troubleshooting AirDrop Connection Issues
If you're having trouble with AirDrop, try these solutions:
1. Make Sure Both Devices Meet Requirements
Double-check that both devices meet the minimum system requirements for AirDrop as mentioned earlier.
2. Check Bluetooth and Wi-Fi
- Ensure both Bluetooth and Wi-Fi are turned on
- Try toggling them off and back on again
- Remember that you don't need to be connected to a Wi-Fi network, but Wi-Fi needs to be enabled
3. Check Discovery Settings
Make sure your AirDrop discovery setting is appropriate:
- If sharing with someone in your contacts, both devices should be set to at least "Contacts Only"
- If the person isn't in your contacts, set AirDrop to "Everyone"
- Make sure the contact information matches what's in your Contacts app if using "Contacts Only"
4. Check Physical Proximity
AirDrop works best when devices are within 30 feet (9 meters) of each other. Move the devices closer together if you're having issues.
5. Restart Finder
- Click the Apple menu in the top-left corner
- Hold down the Option key
- Click "Relaunch Finder"
6. Restart Your Mac
Sometimes a simple restart can fix connectivity issues:
- Click the Apple menu
- Select "Restart"
- Click "Restart" again to confirm
7. Create a New User Account
If you're still having issues, try creating a new user account to see if the problem is specific to your account:
- Go to System Preferences > Users & Groups
- Click the lock icon and enter your password
- Click the + button to add a new user
- Log in to the new account and test AirDrop
AirDrop vs. Other File Sharing Methods
How does AirDrop compare to other ways of sharing files? Let's look at the advantages and limitations:
| Feature | AirDrop | Cloud Storage | USB Drive | |
|---|---|---|---|---|
| Speed | Very fast for nearby devices | Depends on internet speed | Depends on internet speed | Fast but requires physical connection |
| File size limits | No practical limit | Typically 10-25MB | Varies by service | Limited by drive capacity |
| Range | ~30 feet | Worldwide | Worldwide | Physical connection required |
| Device compatibility | Apple devices only | Any device with email | Most platforms | Any device with USB port |
| Internet required | No | Yes | Yes | No |
Advanced AirDrop Tips and Tricks
Share Website Links
You can quickly share a website from Safari:
- In Safari, click the Share button in the toolbar
- Select AirDrop
- Choose the recipient
Share App Store Items
Found an app you think a friend might like?
- In the App Store, find the app you want to share
- Click the "..." button next to the price/download button
- Select "Share App"
- Choose AirDrop and select your recipient
Share Contact Information
- Open the Contacts app
- Select the contact you want to share
- Click the Share button
- Choose AirDrop and select your recipient
Share Photos and Videos
- Open Photos app
- Select one or multiple photos/videos
- Click the Share button
- Choose AirDrop and select your recipient
Share Map Locations
- In Maps, find a location
- Click the Share button
- Select AirDrop and choose your recipient
Security Considerations When Using AirDrop
AirDrop is designed with security in mind, but there are still some precautions you should take:
Keep Your Discovery Settings Appropriate
In public places, it's best to set AirDrop to "Contacts Only" or "No One" to prevent strangers from sending you unwanted files. Only use the "Everyone" setting when you need to receive a file from someone who isn't in your contacts.
Always Check Before Accepting
Always look at the preview before accepting any AirDrop file. Never accept files from people you don't know, as they could potentially contain malware.
File Encryption
AirDrop uses TLS encryption to secure file transfers, making it difficult for others to intercept your data. This makes it more secure than many other file-sharing methods.
Privacy Concerns
When AirDrop is set to "Everyone," your device name and photo (if you have one set up in your contact card) are visible to nearby Apple users. If privacy is a concern, use "Contacts Only" or "No One" when not actively using AirDrop.
Using AirDrop with Different macOS Versions
AirDrop has evolved over different macOS versions. Here's what you need to know:
macOS Monterey, Big Sur, and Catalina
In these newer versions, AirDrop is accessible through:
- Finder sidebar
- Control Center in the menu bar
- Share sheets
macOS Mojave and High Sierra
AirDrop works similarly but is accessed through:
- Finder sidebar
- Share sheets
Older macOS Versions
In older versions like Sierra and El Capitan, AirDrop functionality is more limited, but the basic access through Finder remains the same.
AirDrop Between Mac and iOS Devices
Sharing between your Mac and iPhone or iPad works the same way as between Macs, with a few differences:
Sending from Mac to iOS
- On your Mac, find the file you want to send
- Click the Share button or use the Finder AirDrop window
- Select your iOS device from the list of available devices
- On your iOS device, you'll see a notification asking you to accept the file
- Tap "Accept" to receive the file
Sending from iOS to Mac
- On your iOS device, find the item you want to share
- Tap the Share button
- Tap AirDrop
- Select your Mac from the list of devices
- On your Mac, click "Accept" when prompted
- The file will be saved to your Downloads folder
Frequently Asked Questions
1. Why can't I see AirDrop in my Finder sidebar?
If AirDrop isn't visible in your Finder sidebar, go to Finder > Preferences > Sidebar and make sure the AirDrop checkbox is selected under the "Favorites" section. If it still doesn't appear, your Mac might be too old to support AirDrop. Check that your Mac meets the minimum requirements (2008 or newer, excluding the 2008 MacBook).
2. Does AirDrop use my cellular data or Wi-Fi network?
No, AirDrop creates its own direct Wi-Fi network between devices. While it requires Wi-Fi and Bluetooth to be turned on, it doesn't use your internet connection or cellular data. This means you can use AirDrop even when you're not connected to a Wi-Fi network or in areas with poor cellular coverage.
3. Is there a file size limit for AirDrop transfers?
There's no official file size limit for AirDrop transfers. You can send large files like videos or multiple high-resolution photos. However, larger files will take longer to transfer. The practical limit depends on the storage space available on the receiving device and the stability of the connection between devices.
4. Why does my Mac only show up as a silhouette in other people's AirDrop?
If your Mac appears as a generic silhouette instead of showing your contact photo, it's likely because you don't have a contact card set up for yourself, or the other person doesn't have you in their contacts. To fix this, open the Contacts app, find your card (or create one), and add a photo. Make sure your Apple ID email is included in this contact card.
5. Can I AirDrop between my Mac and non-Apple devices like Android or Windows?
No, AirDrop is an Apple-exclusive feature that works only between Apple devices (Mac, iPhone, iPad, and iPod touch). For sharing files with Android or Windows devices, you'll need to use alternative methods like email, cloud storage services (Dropbox, Google Drive), or third-party apps like Send Anywhere or Snapdrop that mimic AirDrop's functionality across different platforms.
Conclusion
AirDrop is one of those features that makes the Apple ecosystem shine. It provides a quick, secure, and wireless way to transfer files between your devices without the need for emails, messages, or cloud services. By following the steps in this guide, you can easily turn on AirDrop on your Mac and start enjoying seamless file transfers.
Remember to adjust your discovery settings based on your environment—use "Contacts Only" or "No One" in public places, and only switch to "Everyone" when needed. If you run into issues, the troubleshooting tips should help you get back up and running.
Whether you're sharing photos from your latest vacation, sending documents to a colleague, or transferring files between your own devices, AirDrop makes the process simple and fast. Now that you know how to use it, you can say goodbye to the days of emailing files to yourself or fumbling with USB drives.


