Menu
Start Free $129 Lifetime
Why is it the #1 bulk uploader?
- Insanely fast!
- Maintains folder structure.
- 100% automated upload.
- Supports RAW files.
- Privacy default.
How can you get started?
Download PicBackMan and start free, then upgrade to annual or lifetime plan as per your needs. Join 100,000+ users who trust PicBackMan for keeping their precious memories safe in multiple online accounts.
Trusted by users in 125+ countries.
“Your pictures are scattered. PicBackMan helps you bring order to your digital memories.”
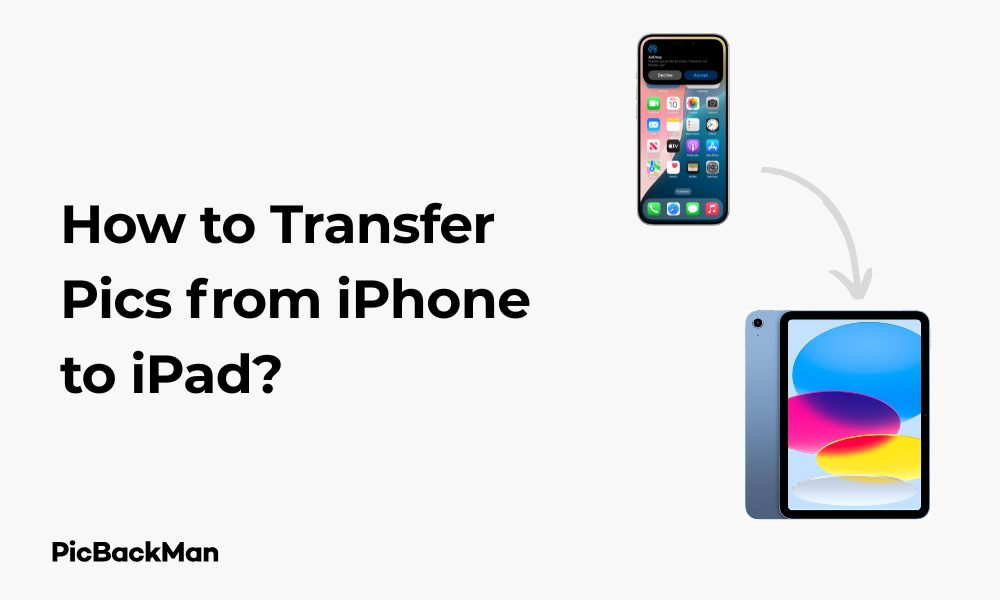
How to Transfer Pics from iPhone to iPad?

Sharing photos between your Apple devices should be simple, right? Yet many iPhone and iPad users find themselves puzzled when trying to move their precious memories from one device to another. Whether you've captured amazing vacation shots on your iPhone or want to view family photos on your iPad's larger screen, knowing how to transfer pictures efficiently can save you time and frustration.
In this guide, I'll walk you through several reliable methods to transfer photos from your iPhone to iPad. From Apple's built-in features to third-party solutions, you'll find options that match your specific needs and technical comfort level.
Using iCloud Photos for Seamless Photo Sharing
Apple's iCloud service offers perhaps the most straightforward way to keep photos synced between your devices automatically.
Setting Up iCloud Photos
- On your iPhone, go to Settings and tap on your Apple ID at the top
- Select "iCloud"
- Tap "Photos"
- Toggle on "iCloud Photos"
- Repeat these same steps on your iPad
Once enabled on both devices, your photos will sync automatically whenever both devices are connected to Wi-Fi and have sufficient battery life.
Important Note About iCloud Storage
Apple only provides 5GB of free iCloud storage, which fills up quickly with photos. You might need to purchase additional storage if you have a large photo library. Current pricing starts at $0.99/month for 50GB, with larger storage options available.
Managing iCloud Photo Options
When setting up iCloud Photos, you'll see two storage optimization options:
- Optimize iPhone/iPad Storage: Keeps smaller versions of photos on your device while storing full-resolution versions in iCloud
- Download and Keep Originals: Stores full-resolution photos on your device (requires more storage space)
Choose "Optimize Storage" if you're concerned about device storage space. This way, your full photo library remains accessible without filling up your device.
AirDrop: The Quick Transfer Solution
AirDrop provides a direct device-to-device transfer method that works without internet connection—perfect for transferring selected photos quickly.
How to Use AirDrop to Transfer Photos
- Make sure both your iPhone and iPad have Bluetooth and Wi-Fi turned on
- On both devices, open Control Center (swipe down from the top-right corner on newer devices or up from the bottom on older models)
- Press and hold the wireless controls section
- Tap AirDrop and select “Contacts Only” or “Everyone”
- On your iPhone, open the Photos app
- Select the photos you want to transfer
- Tap the share icon (square with an arrow)
- Your iPad should appear in the AirDrop section of the share sheet
- Tap on your iPad's icon
- Accept the incoming transfer on your iPad
The photos will transfer directly and appear in your iPad's Photos app. This method works best when transferring a reasonable number of photos at once—trying to send hundreds might be impractical.
AirDrop Troubleshooting
If your devices aren't seeing each other:
- Make sure both devices are awake with screens unlocked
- Verify both devices are signed in with the same Apple ID
- Check that both devices have AirDrop enabled
- Try toggling Bluetooth and Wi-Fi off and on again
- Ensure devices are within 30 feet of each other
Using the Photos App and iCloud Shared Albums
If you only want to transfer specific photos without enabling full iCloud Photos sync, Shared Albums provide a targeted solution.
Creating and Using Shared Albums
- On your iPhone, open the Photos app
- Select the photos you want to transfer
- Tap the share icon
- Scroll down and select "Add to Shared Album"
- Either select an existing shared album or create a new one by tapping "New Shared Album"
- If creating a new album, give it a name and tap “Next”
- You can add people to share with or keep it private by tapping “Create”
- On your iPad, open the Photos app and go to the “For You” tab
- Tap “Shared Albums” and select the album you just created
- To save photos to your iPad, select the photos, tap the share icon, and choose “Save Image”
This method gives you more control over exactly which photos get transferred between devices.
iTunes and Finder Sync: The Traditional Method
For those who prefer a wired connection or need to transfer large photo libraries, syncing through iTunes (on Windows or older macOS) or Finder (on macOS Catalina and newer) remains reliable.
Transferring Photos Using a Computer
On Windows or macOS Mojave and earlier:
- Connect your iPhone to your computer using a USB cable
- Open iTunes
- Select your iPhone when it appears in iTunes
- Click on "Photos" in the sidebar
- Check “Sync Photos” and select the source of photos
- Choose to sync all photos or selected albums
- Click "Apply" or "Sync" at the bottom right
- After syncing completes, disconnect your iPhone
- Connect your iPad and repeat the process, making sure to sync the same photos
On macOS Catalina or newer:
- Connect your iPhone to your Mac using a USB cable
- Open Finder
- Select your iPhone from the sidebar under “Locations”
- Click on the "Photos" tab
- Check "Sync Photos" and select the source
- Choose your sync options
- Click "Apply" or "Sync"
- Repeat with your iPad
This method works well for large transfers but requires a computer as an intermediary.
Using Third-Party Apps and Services
Several third-party options can help transfer photos between your devices, often with additional features beyond what Apple provides.
Cloud Storage Services
Popular cloud storage services like Google Photos, Dropbox, or OneDrive offer alternatives to iCloud:
| Service | Free Storage | Key Features |
|---|---|---|
| Google Photos | 15GB (shared with Google Drive) | Excellent search, automatic organization, unlimited storage for "Storage saver" quality |
| Dropbox | 2GB | Simple interface, automatic camera uploads, cross-platform |
| OneDrive | 5GB | Integration with Microsoft services, automatic organization |
Using Google Photos
- Download Google Photos on both your iPhone and iPad from the App Store
- Sign in with the same Google account on both devices
- On your iPhone, tap your profile picture > Google Photos settings > Back up & sync
- Toggle on "Back up & sync"
- Wait for photos to upload (this happens automatically in the background)
- On your iPad, open Google Photos and your iPhone photos will appear once they've been uploaded
- To save specific photos to your iPad's camera roll, select them, tap the share icon, and choose "Save to device"
File Transfer Apps
Dedicated file transfer apps provide direct device-to-device transfer options:
- Send Anywhere: Allows transfers via a 6-digit key, links, or direct device connection
- PhotoSync: Specialized for photo/video transfers with many customization options
- Documents by Readdle: Multifunctional file manager with transfer capabilities
Using Send Anywhere
- Download Send Anywhere on both your iPhone and iPad
- On your iPhone, open the app and tap “Send”
- Select the photos you want to transfer
- Tap "Send"
- The app will generate a 6-digit key
- On your iPad, open Send Anywhere and tap “Receive”
- Enter the 6-digit key from your iPhone
- The transfer will begin automatically
Using Email or Messaging Apps
For transferring just a few photos, email or messaging apps provide simple solutions that don't require special setup.
Email Method
- On your iPhone, open the Photos app
- Select the photos you want to transfer
- Tap the share icon
- Select "Mail"
- Send the email to yourself
- On your iPad, open your email app
- Open the email you sent
- Press and hold on each photo, then select "Save Image"
This method works best for sending just a few photos at a time, as email services typically limit attachment sizes.
Using iMessage
- On your iPhone, open the Photos app
- Select the photos you want to transfer
- Tap the share icon
- Select "Message"
- Send the message to yourself
- On your iPad, open the Messages app
- Find the message with the photos
- Press and hold each photo, then select "Save"
Image Quality Consideration
When using messaging apps, be aware that some may compress your photos, reducing their quality. For preserving original quality, iCloud Photos, AirDrop, or dedicated transfer apps are better options.
Compare All Photo Transfer Methods
Here's a comprehensive comparison of all the methods to help you choose the best one for your needs:
| Method | Speed | Ease of Use | Internet Required | Best For |
|---|---|---|---|---|
| iCloud Photos | Moderate (depends on connection) | Very Easy | Yes | Automatic syncing of entire library |
| AirDrop | Fast | Easy | No (uses Bluetooth/Wi-Fi) | Quick transfers of selected photos |
| Shared Albums | Moderate | Easy | Yes | Sharing specific collections |
| iTunes/Finder | Fast | Moderate | No | Large transfers require a computer |
| Third-Party Cloud | Moderate | Easy | Yes | Cross-platform sharing, additional features |
| Transfer Apps | Fast | Moderate | Varies by app | Customizable transfer options |
| Email/Messages | Slow | Very Easy | Yes | Transferring just a few photos |
Step-by-Step Guide for Absolute Beginners
If you're new to Apple devices, here's the simplest method I recommend:
The Easiest Approach: iCloud Photos
- Make sure both devices are charged and connected to Wi-Fi
- On your iPhone, open Settings
- Tap on your name at the top
- Tap "iCloud"
- Tap "Photos"
- Turn on "iCloud Photos"
- Select "Optimize iPhone Storage" if you're concerned about space
- Now pick up your iPad
- Open Settings
- Tap on your name at the top
- Tap "iCloud"
- Tap "Photos"
- Turn on "iCloud Photos"
- Wait for your photos to sync (this may take some time depending on your connection speed and number of photos)
Once set up, this method requires no further action—all your photos will automatically appear on both devices.
Troubleshooting Common Photo Transfer Issues
Even with Apple's "it just works" philosophy, you might encounter some problems. Here are solutions to common issues:
Photos Not Syncing via iCloud
- Check that both devices are signed in to the same Apple ID
- Verify both devices have "iCloud Photos" enabled
- Ensure both devices are connected to Wi-Fi
- Check your iCloud storage isn't full (Settings > [Your Name] > iCloud > Manage Storage)
- Restart both devices
- Make sure your iOS/iPadOS is up to date
AirDrop Not Working
- Ensure both Bluetooth and Wi-Fi are enabled on both devices
- Check that both devices have AirDrop set to “Contacts Only” or “Everyone”
- Make sure both devices are close to each other (within 30 feet)
- Try toggling Airplane Mode on and off on both devices
- Restart both devices if problems persist
iTunes/Finder Sync Problems
- Try a different USB cable or port
- Make sure your iTunes/macOS is updated to the latest version
- Restart your computer and iOS devices
- Check that your devices trust your computer when prompted
- Try resetting sync history in iTunes preferences
Security and Privacy Considerations
When transferring personal photos, keep these security points in mind:
- iCloud Security: Your iCloud photos are encrypted both in transit and on Apple's servers
- Third-Party Services: Read privacy policies before using non-Apple services
- Public Wi-Fi: Avoid transferring sensitive photos over public Wi-Fi networks
- AirDrop Settings: Set AirDrop to “Contacts Only” when in public to prevent unwanted photo requests
- Shared Albums Privacy: Be mindful of who you invite to share albums
Maintaining Photo Organization Across Devices
Keeping your photo collection organized makes finding and enjoying your photos easier:
Creating a Consistent Album Structure
Whether using iCloud Photos or another method, create a consistent album structure:
- Open the Photos app on your primary device
- Tap "Albums" then the "+" icon
- Select "New Album" and name it
- Add relevant photos to your albums
- If using iCloud Photos, these albums will sync automatically
- For other methods, recreate the same album structure on your second device
Using Smart Albums and Features
Take advantage of Apple's smart organization features:
- The "People" album automatically identifies and groups photos of the same person
- The “Places” feature organizes photos by location
- Use the search function to find photos by content, location, or date
- Create Memories for automatic collections of related photos
Frequently Asked Questions
1. Will transferring photos from my iPhone to iPad use up storage on both devices?
If you use iCloud Photos with "Optimize Storage" enabled, full-resolution photos are stored in iCloud while device-appropriate versions are kept on each device, minimizing storage impact. With direct transfer methods like AirDrop or apps, photos will occupy storage space on both devices unless you delete them from one after transfer.
2. Can I transfer photos from my iPhone to iPad without using iCloud?
Yes, you have several options: AirDrop for wireless transfers, iTunes/Finder sync using a computer, third-party apps like Google Photos or Send Anywhere, or even email and messaging apps for smaller transfers. None of these require iCloud.
3. Why are my photos appearing in lower quality on my iPad after transfer?
This typically happens when using methods that compress photos, like some messaging apps or email. For full-quality transfers, use AirDrop, iCloud Photos with “Download and Keep Originals” enabled, or direct computer transfers. Check your settings if using third-party cloud services, as some may compress photos by default.
4. How long does it take to transfer a large photo library between devices?
Transfer time depends on your method, connection speed, and library size. iCloud Photos may take hours or even days for initial syncing of thousands of photos. AirDrop transfers several photos per minute but isn't practical for entire libraries. Computer-based transfers via cable are typically fastest for large collections, often completing in minutes to hours.
5. If I delete photos from my iPhone after transferring them to my iPad, will they still be available on my iPad?
It depends on your transfer method. With iCloud Photos, deleting from one device removes photos from all devices unless you've saved a local copy. With direct transfers like AirDrop, email, or third-party apps, photos remain on the receiving device even if deleted from the original device.
Quick Tip to ensure your videos never go missing

Conclusion
Transferring photos from your iPhone to your iPad doesn't have to be complicated. Whether you prefer the seamless automation of iCloud Photos, the direct approach of AirDrop, or the flexibility of third-party apps, there's a method that will work for your specific needs.
For most users, enabling iCloud Photos provides the simplest ongoing solution, while AirDrop excels at quick, one-time transfers. If you're dealing with large photo libraries or have special requirements, consider using a computer or specialized transfer applications.
Remember that the best method depends on your specific situation—factors like internet access, the number of photos, and how frequently you need to transfer will all influence which approach works best for you. With the methods outlined in this guide, you can easily enjoy your photo memories across all your Apple devices.


