Menu
Start Free $129 Lifetime
Why is it the #1 bulk uploader?
- Insanely fast!
- Maintains folder structure.
- 100% automated upload.
- Supports RAW files.
- Privacy default.
How can you get started?
Download PicBackMan and start free, then upgrade to annual or lifetime plan as per your needs. Join 100,000+ users who trust PicBackMan for keeping their precious memories safe in multiple online accounts.
Trusted by users in 125+ countries.
“Your pictures are scattered. PicBackMan helps you bring order to your digital memories.”
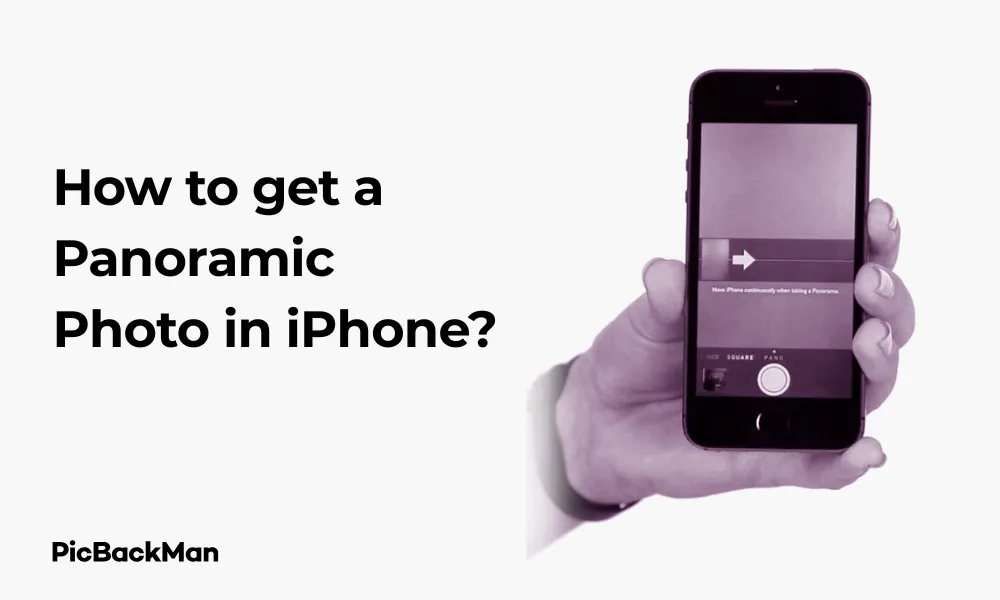
How to get a Panoramic Photo in iPhone?

Taking panoramic photos with your iPhone is a fantastic way to capture breathtaking landscapes, large group photos, or any wide scene that won't fit in a standard frame. The good news is that your iPhone has a built-in panorama feature that's easy to use and produces stunning results. In this guide, I'll walk you through exactly how to take perfect panoramic photos with your iPhone, along with tips, tricks, and troubleshooting advice.
What is a Panoramic Photo?
A panoramic photo (or simply "pano") is a wide-angle image that captures a much wider field of view than a standard photo. Instead of being limited to what fits in your camera frame, panoramas allow you to sweep your camera across a scene to create one continuous, ultra-wide image.
iPhones have had this capability built into their camera app since iOS 6, and the feature has only gotten better with each new iPhone model and iOS update.
Basic Steps to Take a Panoramic Photo on iPhone
Let's start with the fundamental process of capturing a panorama on your iPhone:
- Open the Camera app on your iPhone
- Swipe left on the camera mode selector until you reach “Pano” mode
- Hold your iPhone vertically (portrait orientation)
- Tap the shutter button to begin
- Move your iPhone slowly and steadily from left to right
- Tap the shutter button again to end the panorama before reaching the end, or continue until it stops automatically
Important: Keep Your iPhone Level
The most crucial aspect of taking great panoramic photos is keeping your iPhone level as you pan. Follow the arrow and try to keep it on the center line for the best results. If you move too far up or down, the panorama quality will suffer.
Detailed Guide to Taking Perfect Panoramic Photos on iPhone
1. Accessing the Panorama Mode
There are actually two ways to access the panorama mode on your iPhone:
Method 1: Through the Camera Mode Selector
- Open the Camera app from your home screen
- At the bottom of the screen (or side if you're holding horizontally), you'll see different camera modes
- Swipe left until you see "PANO" (short for panorama)
- Tap on it or simply stop swiping when it's selected
Method 2: Quick Access Through Control Center
- Swipe down from the top-right corner (iPhone
- Press and hold the Camera icon
- Tap on "Pano" from the expanded menu
2. Setting Up Your Shot
Before you start capturing your panorama, it's important to set up properly:
- Hold your iPhone vertically - While you can take horizontal panoramas, vertical orientation typically gives better results
- Find your starting point - Decide where you want your panorama to begin
- Check the direction arrow - By default, panoramas go from left to right, but you can tap the arrow to change direction
- Stabilize yourself - Plant your feet firmly and find a comfortable position where you can pivot smoothly
3. Capturing the Panorama
Now it's time to take your panoramic photo:
- Tap the shutter button to begin
- You'll see an arrow and a line on the screen - your goal is to keep the arrow on the line as you move
- Move your iPhone slowly and steadily in the direction of the arrow
- Try to maintain a consistent distance from your subject as you pan
- The camera will automatically capture images as you move
- You can tap the shutter button again to end the panorama early, or continue until it completes automatically
Pro Tip: Control Your Speed
Move too fast, and your iPhone will display “Slow Down” on the screen. The ideal speed allows your iPhone to capture clear images while stitching them together seamlessly. Practice makes perfect - don't rush the process!
4. Changing Direction of Your Panorama
By default, the panorama mode on iPhone captures from left to right. However, sometimes the lighting or composition might be better if you shoot in the opposite direction.
To change the direction of your panorama:
- Open the Camera app and select Pano mode
- Before taking the photo, tap the arrow that appears on the screen
- The arrow will flip to point in the opposite direction
- Now you can capture your panorama from right to left
5. Vertical Panoramas
While most people use panoramas for horizontal landscapes, you can also take vertical panoramas to capture tall structures like skyscrapers, waterfalls, or trees:
- Open the Pano mode in the Camera app
- Turn your iPhone 90 degrees so it's in landscape orientation
- Tap the directional arrow if needed so it points upward
- Tap the shutter button and slowly move your iPhone upward
- Continue until you've captured the entire vertical scene
Advanced Panorama Techniques for iPhone
Once you've mastered the basics, try these advanced techniques to take your panoramic photography to the next level:
1. Creating 360-degree panoramas
While the standard panorama mode doesn't capture a full 360-degree view, you can create one by taking multiple panoramas and stitching them together:
- Take your first panorama as normal
- Turn slightly and take another panorama that overlaps with the first one
- Continue until you've gone full circle
- Use a third-party app like Panorama 360 or Google Street View to stitch them together
2. Including people in panoramas
Including people in panoramas can be tricky since they might move during the capture. Here's how to do it effectively:
Method 1: The Stationary Approach
- Ask your subjects to stand still during the entire panorama capture
- Position them away from the seams (where images stitch together)
- Take the panorama at a reasonable distance so they don't occupy too much of the frame
Method 2: The Running Man Trick
This fun trick creates a clone effect of the same person appearing multiple times in one panorama:
- Have your subject start at one end of your panorama frame
- Begin the panorama capture
- After you've panned past your subject, have them quickly run behind you to a new position in the frame you haven't captured yet
- Continue panning and repeat until you have multiple instances of the same person
3. Using Panorama for Group Photos
When you have a large group that won't fit in a standard frame, panorama mode can be your solution:
- Arrange the group in a slight arc (not a straight line)
- Stand at a distance where everyone is visible
- Ask everyone to stay still
- Take the panorama more quickly than usual to minimize the chance of movement
4. Night and Low-Light Panoramas
Taking panoramas in low light requires extra care:
- Use a tripod or stabilizing device if possible
- Move even more slowly than usual to allow more light capture
- Try to include some light sources in your scene for better exposure
- Consider using Night mode first (on iPhone 11 and later) for individual shots instead
Panorama Settings and Options
Your iPhone offers several settings that can affect your panoramic photos:
Resolution Settings
iPhone panoramas can be quite large - up to 63 megapixels on newer models. If you want to adjust the size:
- Go to Settings
- Scroll down and tap Camera
- Tap Formats
- Choose between High Efficiency and Most Compatible
The High Efficiency option (HEIF format) will create smaller file sizes but maintain quality.
Grid Lines
Enabling grid lines can help you keep your panoramas level:
- Go to Settings
- Tap Camera
- Toggle on Grid
Using Exposure Lock
To maintain consistent exposure throughout your panorama:
- Open Pano mode
- Before starting, tap and hold on the screen where you want to set exposure
- When you see AE/AF Lock, release your finger
- Now take your panorama with locked exposure
Comparison: Panorama Capabilities Across iPhone Models
| iPhone Model | Max Panorama Resolution | Special Features |
|---|---|---|
| iPhone 14 Pro/Pro Max | Up to 63MP | Better low-light performance, faster processing |
| iPhone 12/13 series | Up to 63MP | Improved HDR, better edge detection |
| iPhone XS/11 series | Up to 63MP | Smart HDR for better dynamic range |
| iPhone 8/X | Up to 63MP | Good stabilization, standard panorama features |
| iPhone 7 and earlier | Up to 43MP | Basic panorama functionality |
Common Panorama Problems and Solutions
Even with practice, you might encounter some issues when taking panoramic photos. Here are solutions to common problems:
Problem: Visible Seams or Stitching Errors
Solutions:
- Move more slowly and steadily
- Keep the arrow on the guide line
- Avoid scenes with fast-moving objects
- Maintain consistent distance from your subject
- Try to keep lighting conditions consistent across the scene
Problem: Curved or Warped Results
Solutions:
- Pivot from your hips rather than extending your arms
- Stand further away from your subject if possible
- Keep the iPhone at the same height throughout the capture
- For architectural shots, try to position yourself perpendicular to the building
Problem: Inconsistent Exposure or Color
Solutions:
- Use exposure lock (tap and hold on the screen before starting)
- Avoid shooting toward or away from the sun in the same panorama
- Try shooting at a different time of day with more even lighting
- Edit the panorama afterwards to balance exposure across the image
Problem: “Slow Down” Warning Appears Constantly
Solutions:
- Practice a slower, more deliberate movement
- Make sure you have good lighting (the warning appears more in low light)
- Check if your iPhone case is partially blocking the camera
- Ensure your iPhone has sufficient storage space
Editing Panoramic Photos on iPhone
After capturing your panorama, you might want to make some adjustments:
Basic Editing in Photos App
- Open your panorama in the Photos app
- Tap Edit in the top right corner
- Use the tools at the bottom to adjust brightness, contrast, etc.
- Tap Done when finished
Cropping Panoramas
Sometimes you'll want to crop out edges or focus on a specific part:
- Open the panorama and tap Edit
- Tap the Crop tool (square icon)
- Drag the corners to crop as desired
- Tap Done to save
Third-Party Apps for Advanced Editing
For more advanced editing options, consider these apps:
- Snapseed : Free app with powerful tools specifically good for panoramas
- Lightroom : Excellent for color correction and fixing exposure issues
- TouchRetouch : Great for removing unwanted objects that may appear in your panorama
Sharing Your Panoramic Photos
Once you've captured and edited your panorama, it's time to share it:
Standard Sharing Methods
- Open the panorama in Photos
- Tap the Share button (square with arrow)
- Choose your preferred method: Messages, Mail, AirDrop, etc.
Social Media Considerations
Not all social platforms display panoramas well. Here are some tips:
- Instagram : Consider splitting very wide panoramas into multiple posts using an app like Panols
- Facebook : Uploads full panoramas but they may appear compressed
- Twitter : Crops images, so consider linking to the full panorama elsewhere
Printing Panoramic Photos
If you want physical copies of your panoramas:
- Use specialty printing services that offer panoramic prints
- Consider canvas prints for particularly stunning landscapes
- Make sure to use the highest quality version of your panorama for printing
Quick Tip to ensure your videos never go missing

Creative Ways to Use Panorama Mode
Beyond standard landscape shots, try these creative uses for panorama mode:
Tiny Planet Effect
Create a "tiny planet" by taking a 360-degree panorama and using an app like Tiny Planet to transform it into a circular image.
Reverse Panoramas
Create surreal, twisted images by intentionally moving your iPhone up and down while taking a panorama.
Interior Design Documentation
Use panoramas to capture entire rooms for interior design projects or real estate listings.
Sports Action Sequences
Capture a sequence of a moving subject (like a skateboarder doing a trick) across a panorama for a cool action shot.
Frequently Asked Questions
1. Why does my iPhone say "slow down" when I'm taking a panorama?
Your iPhone displays this message when you're moving too quickly for it to properly capture and stitch the images together. Moving at a slower, steady pace allows the camera to collect enough visual information for a high-quality panorama. This is especially common in low-light situations when the camera needs more time to capture each segment.
2. What's the maximum length of a panorama I can take on my iPhone?
The maximum length varies by iPhone model, but most recent models allow you to capture up to 240 degrees of view in a single panorama. This translates to images that can be up to 63 megapixels in size. You can always stop the panorama early by tapping the shutter button if you don't need to capture the full width.
3. Can I take horizontal (tall) panoramas instead of vertical (wide) ones?
Yes! Simply turn your iPhone 90 degrees to landscape orientation before starting the panorama. This allows you to capture tall subjects like skyscrapers, waterfalls, or trees. The technique is the same, but you'll move your iPhone up instead of sideways.
4. Why are there wavy lines or distortions in my panoramic photos?
These distortions typically occur when you don't maintain a steady pivot point while taking the panorama. Try pivoting from your hips rather than extending your arms, and practice keeping the guide arrow on the center line. Also, be aware that panorama mode naturally creates some distortion with close objects, so standing further back can help minimize this effect.
5. How can I fix a panorama that didn't stitch properly?
Unfortunately, there's no built-in way to re-stitch a panorama once it's captured. Your best options are to either retake the panorama with more careful technique or use a third-party app like Affinity Photo or Photoshop that offers panorama stitching features. These apps allow you to manually align and blend individual photos to create a custom panorama.
Conclusion
Taking panoramic photos with your iPhone is a simple yet powerful way to capture breathtaking wide-angle scenes. With the built-in Pano mode, you can create stunning images without any additional equipment or apps. The key to great panoramas is steady movement, maintaining level orientation, and practicing your technique.
Whether you're capturing vast landscapes, large groups, tall buildings, or getting creative with unique effects, the panorama feature on your iPhone opens up exciting photographic possibilities. With the tips and techniques covered in this guide, you'll be taking professional-quality panoramic photos in no time.
Remember that like any photography skill, taking great panoramas improves with practice. Don't be discouraged if your first attempts aren't perfect – keep experimenting with different scenes, lighting conditions, and techniques to develop your panoramic photography skills.


