Menu
Start Free $129 Lifetime
Why is it the #1 bulk uploader?
- Insanely fast!
- Maintains folder structure.
- 100% automated upload.
- Supports RAW files.
- Privacy default.
How can you get started?
Download PicBackMan and start free, then upgrade to annual or lifetime plan as per your needs. Join 100,000+ users who trust PicBackMan for keeping their precious memories safe in multiple online accounts.
Trusted by users in 125+ countries.
“Your pictures are scattered. PicBackMan helps you bring order to your digital memories.”
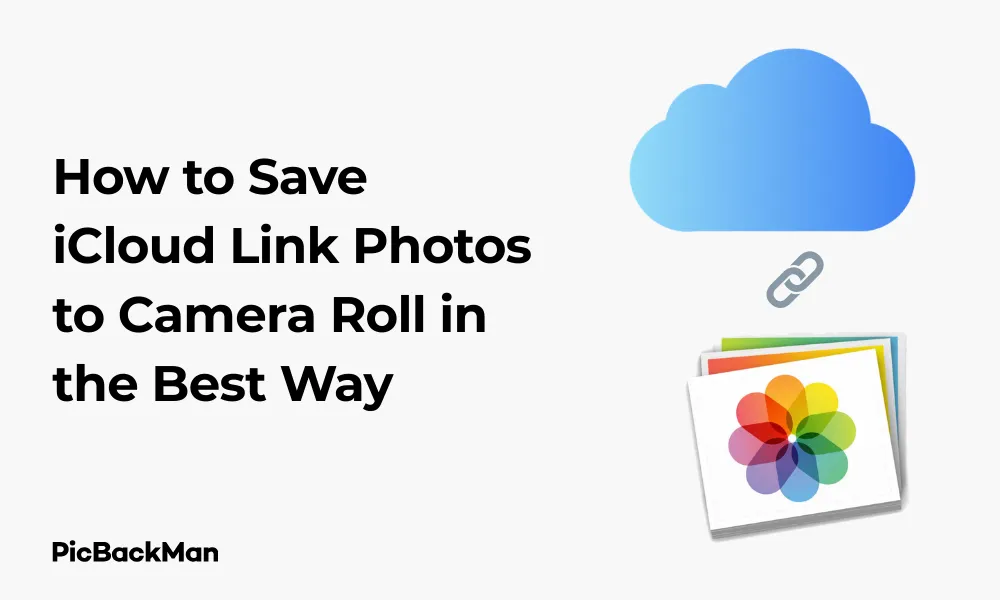
How to Save iCloud Link Photos to Camera Roll in the Best Way

Have you ever received an iCloud link with photos you wanted to save directly to your iPhone's Camera Roll? It's a common situation that can be surprisingly tricky to navigate. Whether it's vacation photos from family, wedding pictures from friends, or work-related images from colleagues, knowing how to properly save these shared photos is essential.
In this guide, I'll walk you through several methods to save iCloud link photos to your Camera Roll quickly and efficiently. I'll cover everything from basic techniques to advanced tricks that will make the process seamless. Let's get those photos where you want them!
Understanding iCloud Photo Sharing Links
Before diving into the saving methods, it helps to understand what an iCloud link actually is. When someone shares photos with you via iCloud, they're essentially creating a temporary web address where these photos are stored. These links typically start with "https://share.icloud.com/" and can contain single images or entire albums.
These shared links have a few important characteristics:
- They can expire after a certain period
- They may contain high-resolution original photos
- They can be accessed from any device with internet access
- They don't automatically save to your personal photo library
Method 1: Saving iCloud Link Photos Using Safari
The most straightforward method to save iCloud link photos involves using Safari, the default browser on your iPhone. Here's how to do it:
Step-by-Step Guide for Safari Method
- Open the iCloud link you received (via Messages, Mail, etc.)
- The link will open in Safari, displaying all shared photos
- Tap on the specific photo you want to save
- Once the photo opens in full view, press and hold on the image
- A menu will appear; tap "Save to Photos"
- The image will now be saved to your Camera Roll
Saving Multiple Photos from Safari
If you need to save several photos at once:
- Open the iCloud shared album in Safari
- Look for the download icon (a cloud with an arrow) at the top of the screen
- Tap the icon to see options for downloading
- Select "Save All" to download all photos at once
Method 2: Using the Photos App to Save iCloud Link Photos
Another effective method involves using the built-in Photos app, which offers better integration with your iPhone's photo library.
Detailed Steps for the Photos App Method
- Open the iCloud link you received
- When the photos load in Safari, tap the “Share” button (the square with an arrow)
- Scroll through the sharing options and select “Copy”
- Open the Photos app on your iPhone
- Tap the "+" icon at the top of the screen
- Select "Add from Web" or "Add from URL" (depending on your iOS version)
- Paste the copied iCloud link
- Select the photos you want to save
- Tap "Add" to import them to your Camera Roll
Benefits of Using the Photos App Method
This approach has several advantages:
- Maintains photo metadata (date, time, location)
- Preserves image quality better than screenshots
- Allows for easier organization into albums
- Syncs properly with your iCloud Photo Library if enabled
Method 3: Downloading iCloud Link Photos on a Computer First
Sometimes, handling large batches of photos is easier on a computer before transferring them to your iPhone.
Computer Download Process
- Open the iCloud link in a web browser on your computer
- Select the photos you want to download (Ctrl+click or Command+click for multiple)
- Click the download button (cloud with arrow) at the top of the page
- Choose a location on your computer to save the photos
Transferring to Your iPhone
After downloading to your computer, you have several options to get the photos to your iPhone:
Using AirDrop
- Select the photos on your Mac
- Click the "Share" button
- Choose "AirDrop" and select your iPhone
- Accept the transfer on your iPhone
- Photos will automatically save to your Camera Roll
Using iCloud Drive
- Upload the photos to iCloud Drive on your computer
- Open the Files app on your iPhone
- Navigate to iCloud Drive
- Find and select your photos
- Tap the "Share" icon
- Choose "Save to Photos"
Method 4: Using the iCloud Photos App
If the shared photos come from someone who's specifically shared an album with you through iCloud Photos, there's a dedicated approach:
Steps for iCloud Shared Albums
- Open the Photos app on your iPhone
- Tap on the “For You” tab at the bottom
- Scroll down to find the “Shared Albums” section
- Open the shared album containing the photos
- Select the photo you want to save
- Tap the "Share" icon (square with arrow)
- Choose "Save to Photos"
Saving multiple photos from shared albums
- Open the shared album
- Tap "Select" in the top-right corner
- Choose all the photos you want to save
- Tap the "Share" icon
- Select "Save to Photos"
Method 5: Using Third-Party Apps to Save iCloud Link Photos
Several third-party apps can streamline the process of saving iCloud photos, especially for large batches.
Recommended Apps
- Documents by Readdle: A file manager that handles cloud links effectively
- PhotoSync: Specialized for photo transfers between devices
- iMazing: Provides advanced iOS file management capabilities
Using Documents by Readdle
- Install Documents by Readdle from the App Store
- Copy your iCloud link
- Open the Documents app
- Tap on the browser icon at the bottom
- Paste the iCloud link in the address bar
- When photos load, select the ones you want
- Tap the "Download" button
- Navigate to the downloaded files in the app
- Select the photos and tap “Share”
- Choose "Save to Photos"
Optional: Using PicBackMan for Bulk Photo Downloads
If you want to manage or backup a large number of iCloud link photos on your computer before transferring them to your iPhone, you can use PicBackMan . This desktop tool automates downloading and organizing photos and videos from connected cloud accounts and lets you save them locally or sync with your online services. :contentReference[oaicite:2]{index=2}
- Visit PicBackMan.com and create a free account
- Download and install the PicBackMan app on your Mac or PC
- Sign in and connect your iCloud Photos (via Apple Photos or iCloud integration)
- Select the photo albums or exported iCloud link photos you want to download
- Download them to your computer
- Transfer the photos from your computer to your iPhone Camera Roll using iCloud, AirDrop, or a USB link
Note: PicBackMan does not save iCloud link photos directly to the Camera Roll on your iPhone — it's a desktop tool best for handling large media collections first, then syncing them to your device.
Troubleshooting Common Issues When Saving iCloud Link Photos
Sometimes you might encounter problems when trying to save iCloud photos. Here are solutions to common issues:
Link Has Expired
iCloud links don't last forever. If you see a message indicating the link has expired:
- Ask the sender to create and send a new link
- Request them to extend the expiration date if possible
- Ask them to share via a different method
Photos Not Showing in Camera Roll After Saving
If you've saved photos but can't find them:
- Check the “Recents” album instead of just scrolling through the Camera Roll
- Use the search function in the Photos app
- Check if they were saved to iCloud but haven't downloaded to your device yet
- Make sure your iPhone has enough storage space
Poor Image Quality After Saving
If saved photos appear lower quality than the originals:
- Make sure you're saving the actual photo, not just a preview
- Check if "Optimize iPhone Storage" is enabled in iCloud settings
- Try the computer download method for highest quality
Comparing All Methods: Which Works Best?
Let's compare all the methods to help you choose the right one for your situation:
| Method | Speed | Ease of Use | Quality Preservation | Best For |
|---|---|---|---|---|
| Safari Method | Fast | Very Easy | Good | Saving 1-5 photos quickly |
| Photos App Method | Medium | Easy | Excellent | Preserving metadata and organization |
| Computer First | Slow | Complex | Excellent | Large batches of high-quality photos |
| iCloud Shared Albums | Fast | Easy | Very Good | Photos already in the iCloud ecosystem |
| Third-Party Apps | Medium | Medium | Very Good | Special cases and power users |
Tips for Managing Saved iCloud Photos on Your iPhone
Once you've saved the photos to your Camera Roll, here are some tips for keeping them organized:
Creating Albums for Saved Photos
- Open the Photos app
- Tap the "Albums" tab
- Tap the "+" icon in the top left
- Select "New Album"
- Name your album (eg, "Family Vacation 2023")
- Select all the photos you just saved from the iCloud link
- Tap "Done"
Backing Up Your Saved Photos
To ensure you don't lose these newly saved photos:
- Enable iCloud Photos in Settings > [Your Name] > iCloud > Photos
- Connect to WiFi and let your phone backup automatically
- Consider a secondary backup service like Google Photos or Amazon Photos
- Periodically transfer important photos to a computer or external drive
Managing Storage Space
Saved photos can quickly fill up your iPhone storage. To manage this:
- Regularly review and delete duplicate or unwanted photos
- Use the “Recently Deleted” album to permanently remove deleted photos
- Enable "Optimize iPhone Storage" if you're using iCloud Photos
- Consider upgrading your iCloud storage if you frequently save many photos
Privacy and Security Considerations
When dealing with iCloud links and saved photos, keep these privacy points in mind:
- iCloud links can potentially be accessed by anyone who has the link
- Photos saved to your Camera Roll will be included in any backups you make
- If you have "My Photo Stream" enabled, saved photos might automatically upload to your other devices
- Photos with location data will retain that information when saved (unless you strip metadata)
To protect sensitive photos:
- Use the “Hidden” album feature in the Photos app
- Consider using the “Notes” app with password protection for truly private photos
- Regularly check which apps have access to your photos in Settings > Privacy > Photos
Quick Tip to ensure your videos never go missing
Videos are precious memories and all of us never want to lose them to hard disk crashes or missing drives. PicBackMan is the easiest and simplest way to keep your videos safely backed up in one or more online accounts.

Simply download PicBackMan (it's free!) , register your account, connect to your online store and tell PicBackMan where your videos are - PicBackMan does the rest, automatically. It bulk uploads all videos and keeps looking for new ones and uploads those too. You don't have to ever touch it.
Conclusion
Saving photos from iCloud links to your Camera Roll doesn't have to be complicated. Whether you prefer the quick Safari method for a few photos, the Photos app approach for better organization, or the computer method for large batches, you now have all the tools to get those shared memories into your personal photo library.
Remember that the best method depends on your specific needs – how many photos you're saving, how important quality is, and how much time you want to spend on the process. With the techniques covered in this guide, you'll be able to handle any iCloud photo sharing situation that comes your way.
Next time someone sends you an iCloud link filled with precious memories or important images, you'll know exactly how to save them properly to your Camera Roll!
Frequently Asked Questions
1. Why can't I save photos from some iCloud links?
If you can't save photos from an iCloud link, it might be expired, the sender may have revoked access, or you might not have a stable internet connection. Ask the sender to share the photos again or try accessing the link from a different network.
2. Do saved iCloud photos take up storage on my iPhone?
Yes, any photos you save from iCloud links to your Camera Roll will take up storage space on your iPhone. If you have iCloud Photos enabled with "Optimize iPhone Storage," full-resolution versions may be stored in iCloud while smaller versions remain on your device.
3. Will I lose quality when saving photos from iCloud links?
Generally, you shouldn't lose quality when saving photos properly from iCloud links. However, if you take screenshots of the photos instead of using the save function, you'll definitely lose quality. Using the direct save methods presented in this article preserves the original quality.
4. Can I save videos from iCloud links the same way as photos?
Yes, you can save videos from iCloud links using similar methods. The process is nearly identical - tap and hold on the video, then select “Save Video” instead of “Save Photo.” Just be aware that videos take up significantly more storage space than photos.
5. How long do iCloud shared links typically last?
By default, iCloud shared links don't expire, but the person who created the link can set an expiration date or manually disable the link at any time. There's no standard duration, so it's best to save important photos promptly rather than assuming the link will remain active indefinitely.


